
Keezer Build
I have had a keggorator for several years, but my in-laws recently decided to get rid of their chest freezer, and I couldn't let the opportunity pass me by and see the thing end up being scrapped!
It's not exactly a modern beast - my wife reckons it's about as old as she is - but it still works. And while, given its age, I don't expect it to be very efficient, I'm also not worried about that because it won't be working very hard as I'll be using a temperature controller to maintain around 8C, rather than having it keeping food frozen.
So this page is a guide to what I did to convert it to a keezer, and any problems I had along the way.
Checking it over
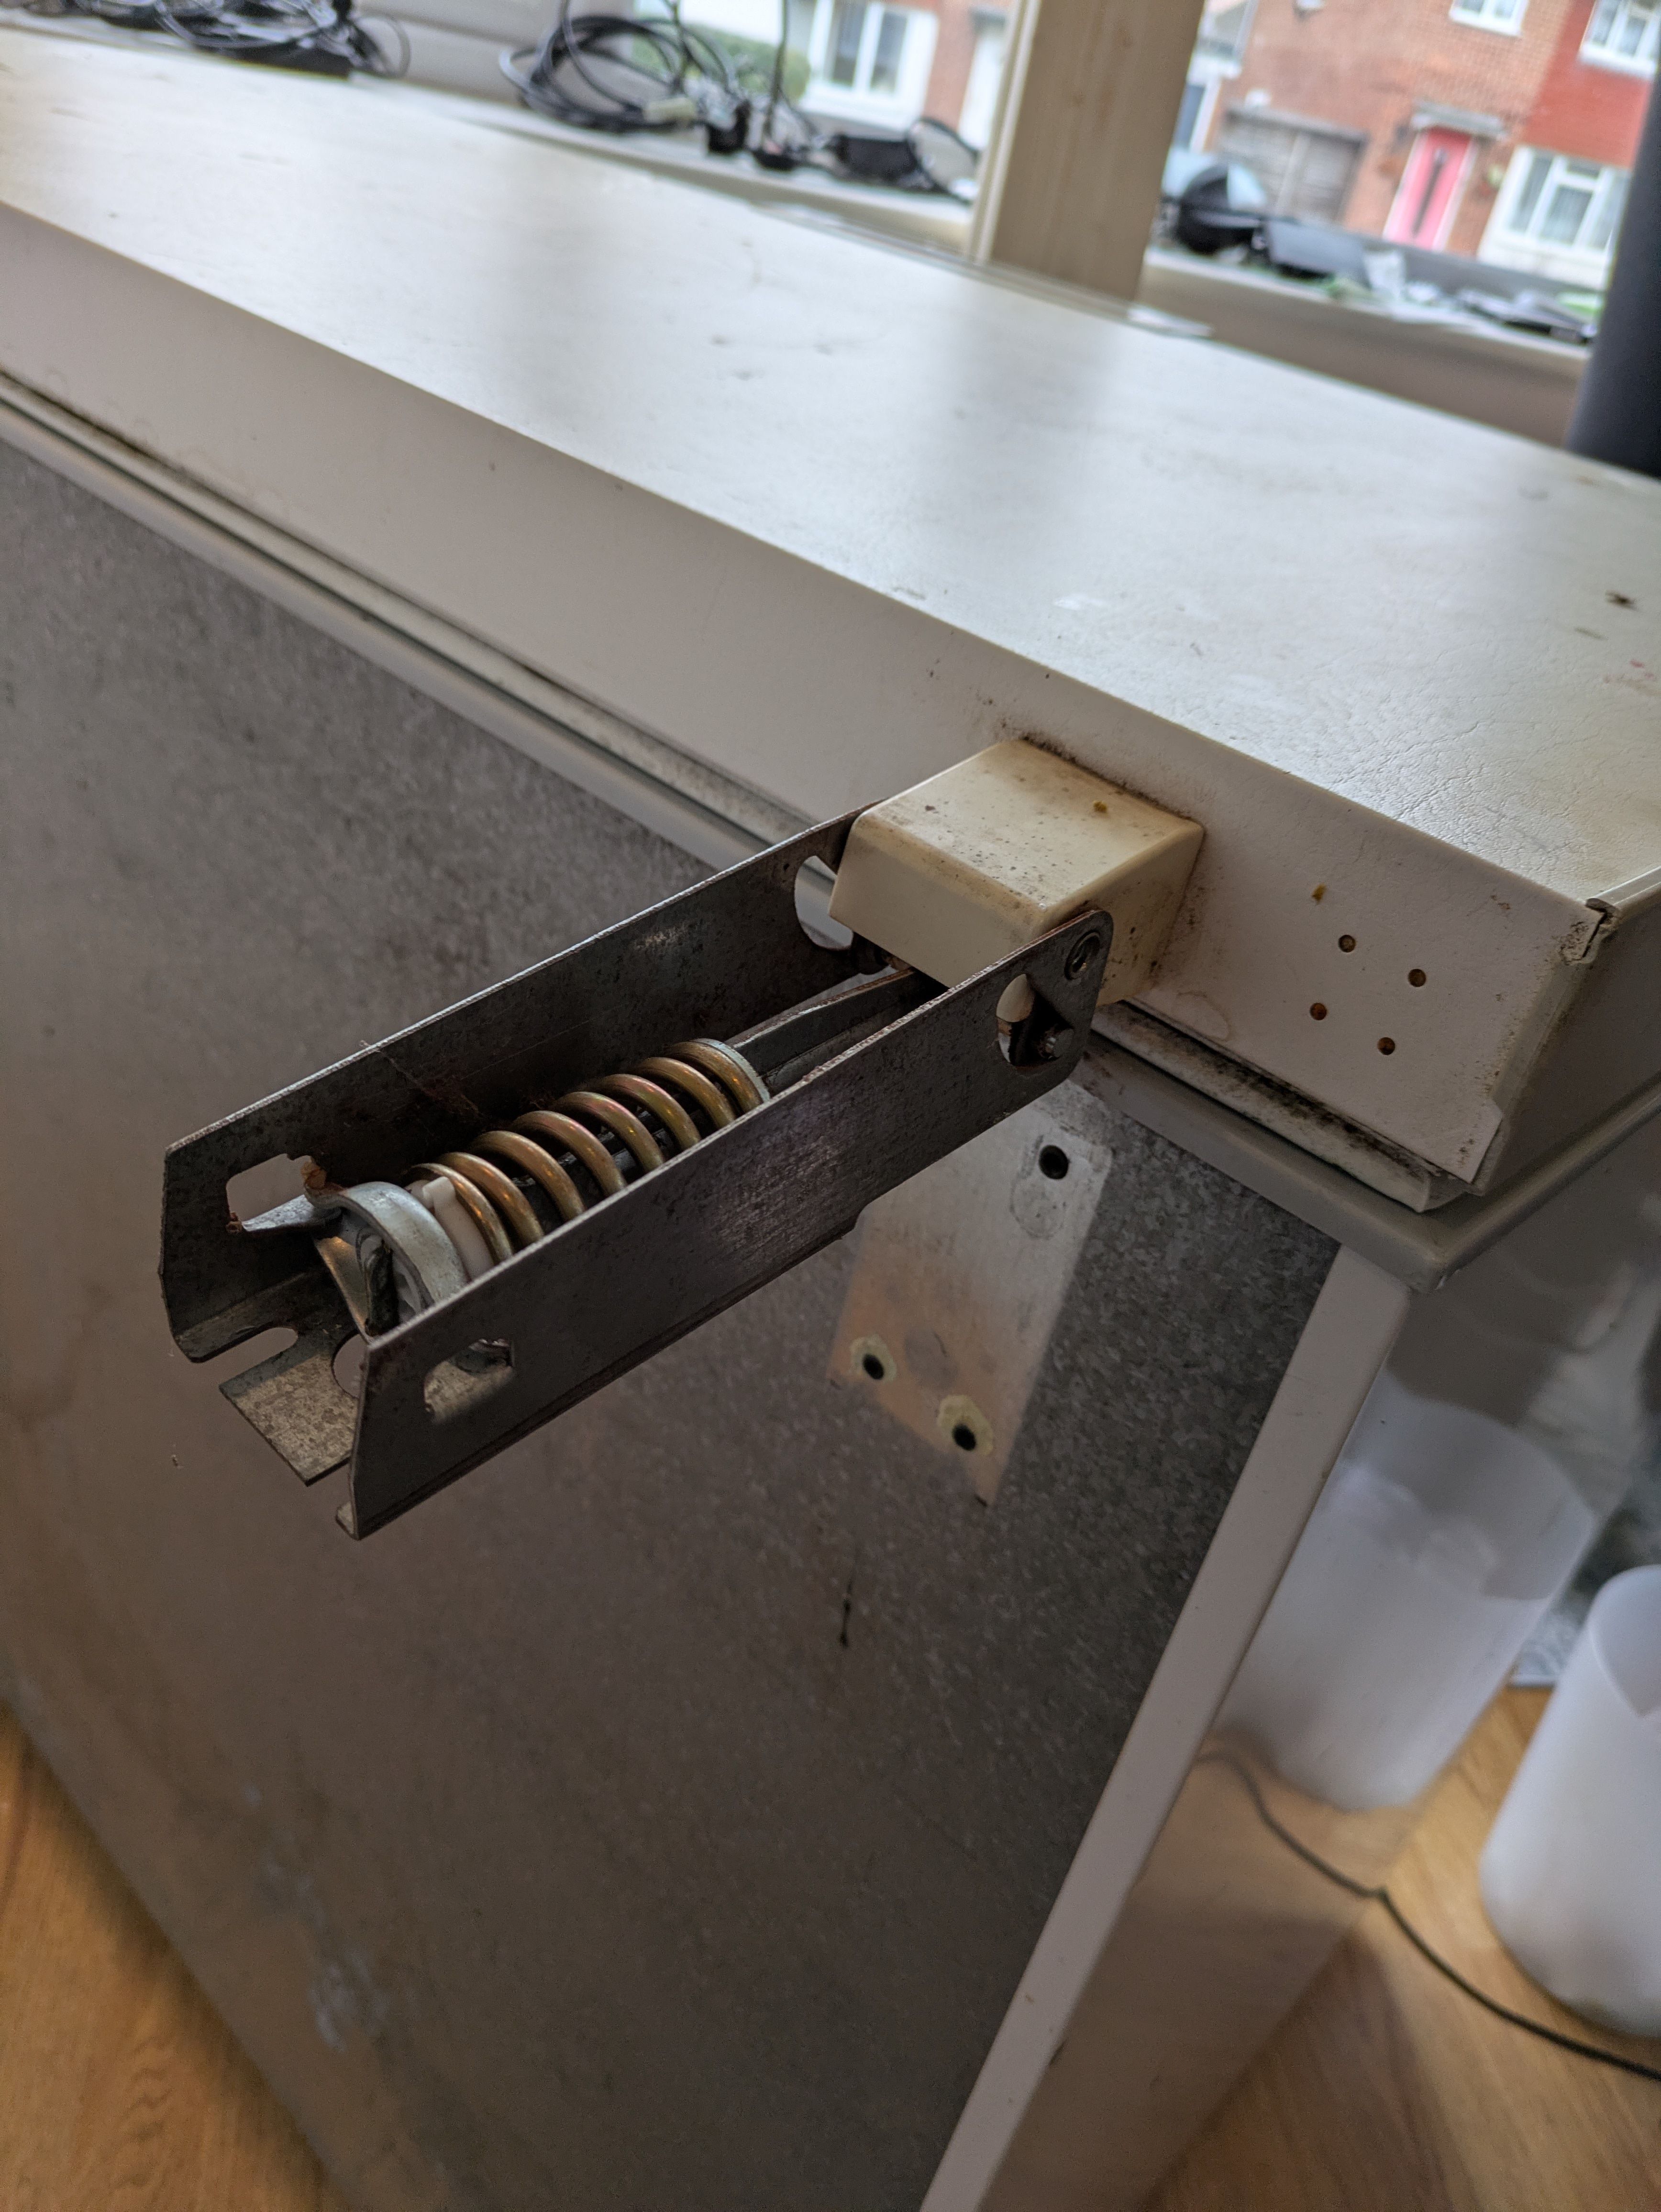
We had a "man-and-a-van" bring it from my in-laws to our house, and they put it in place for me. I had some empty kegs so I could get an idea of how many I'd be able to fit in it (6 normal corney kegs, maybe one or two of which could be Oxebar 20l kegs given they're a little bigger). I let it have a day to settle, then plugged it in and made sure it was still able to cool things down. I also checked that the hinges looked like I'd be able to remove them (very important for a later step in the process), and gave it a wash down with lightly soapy water.
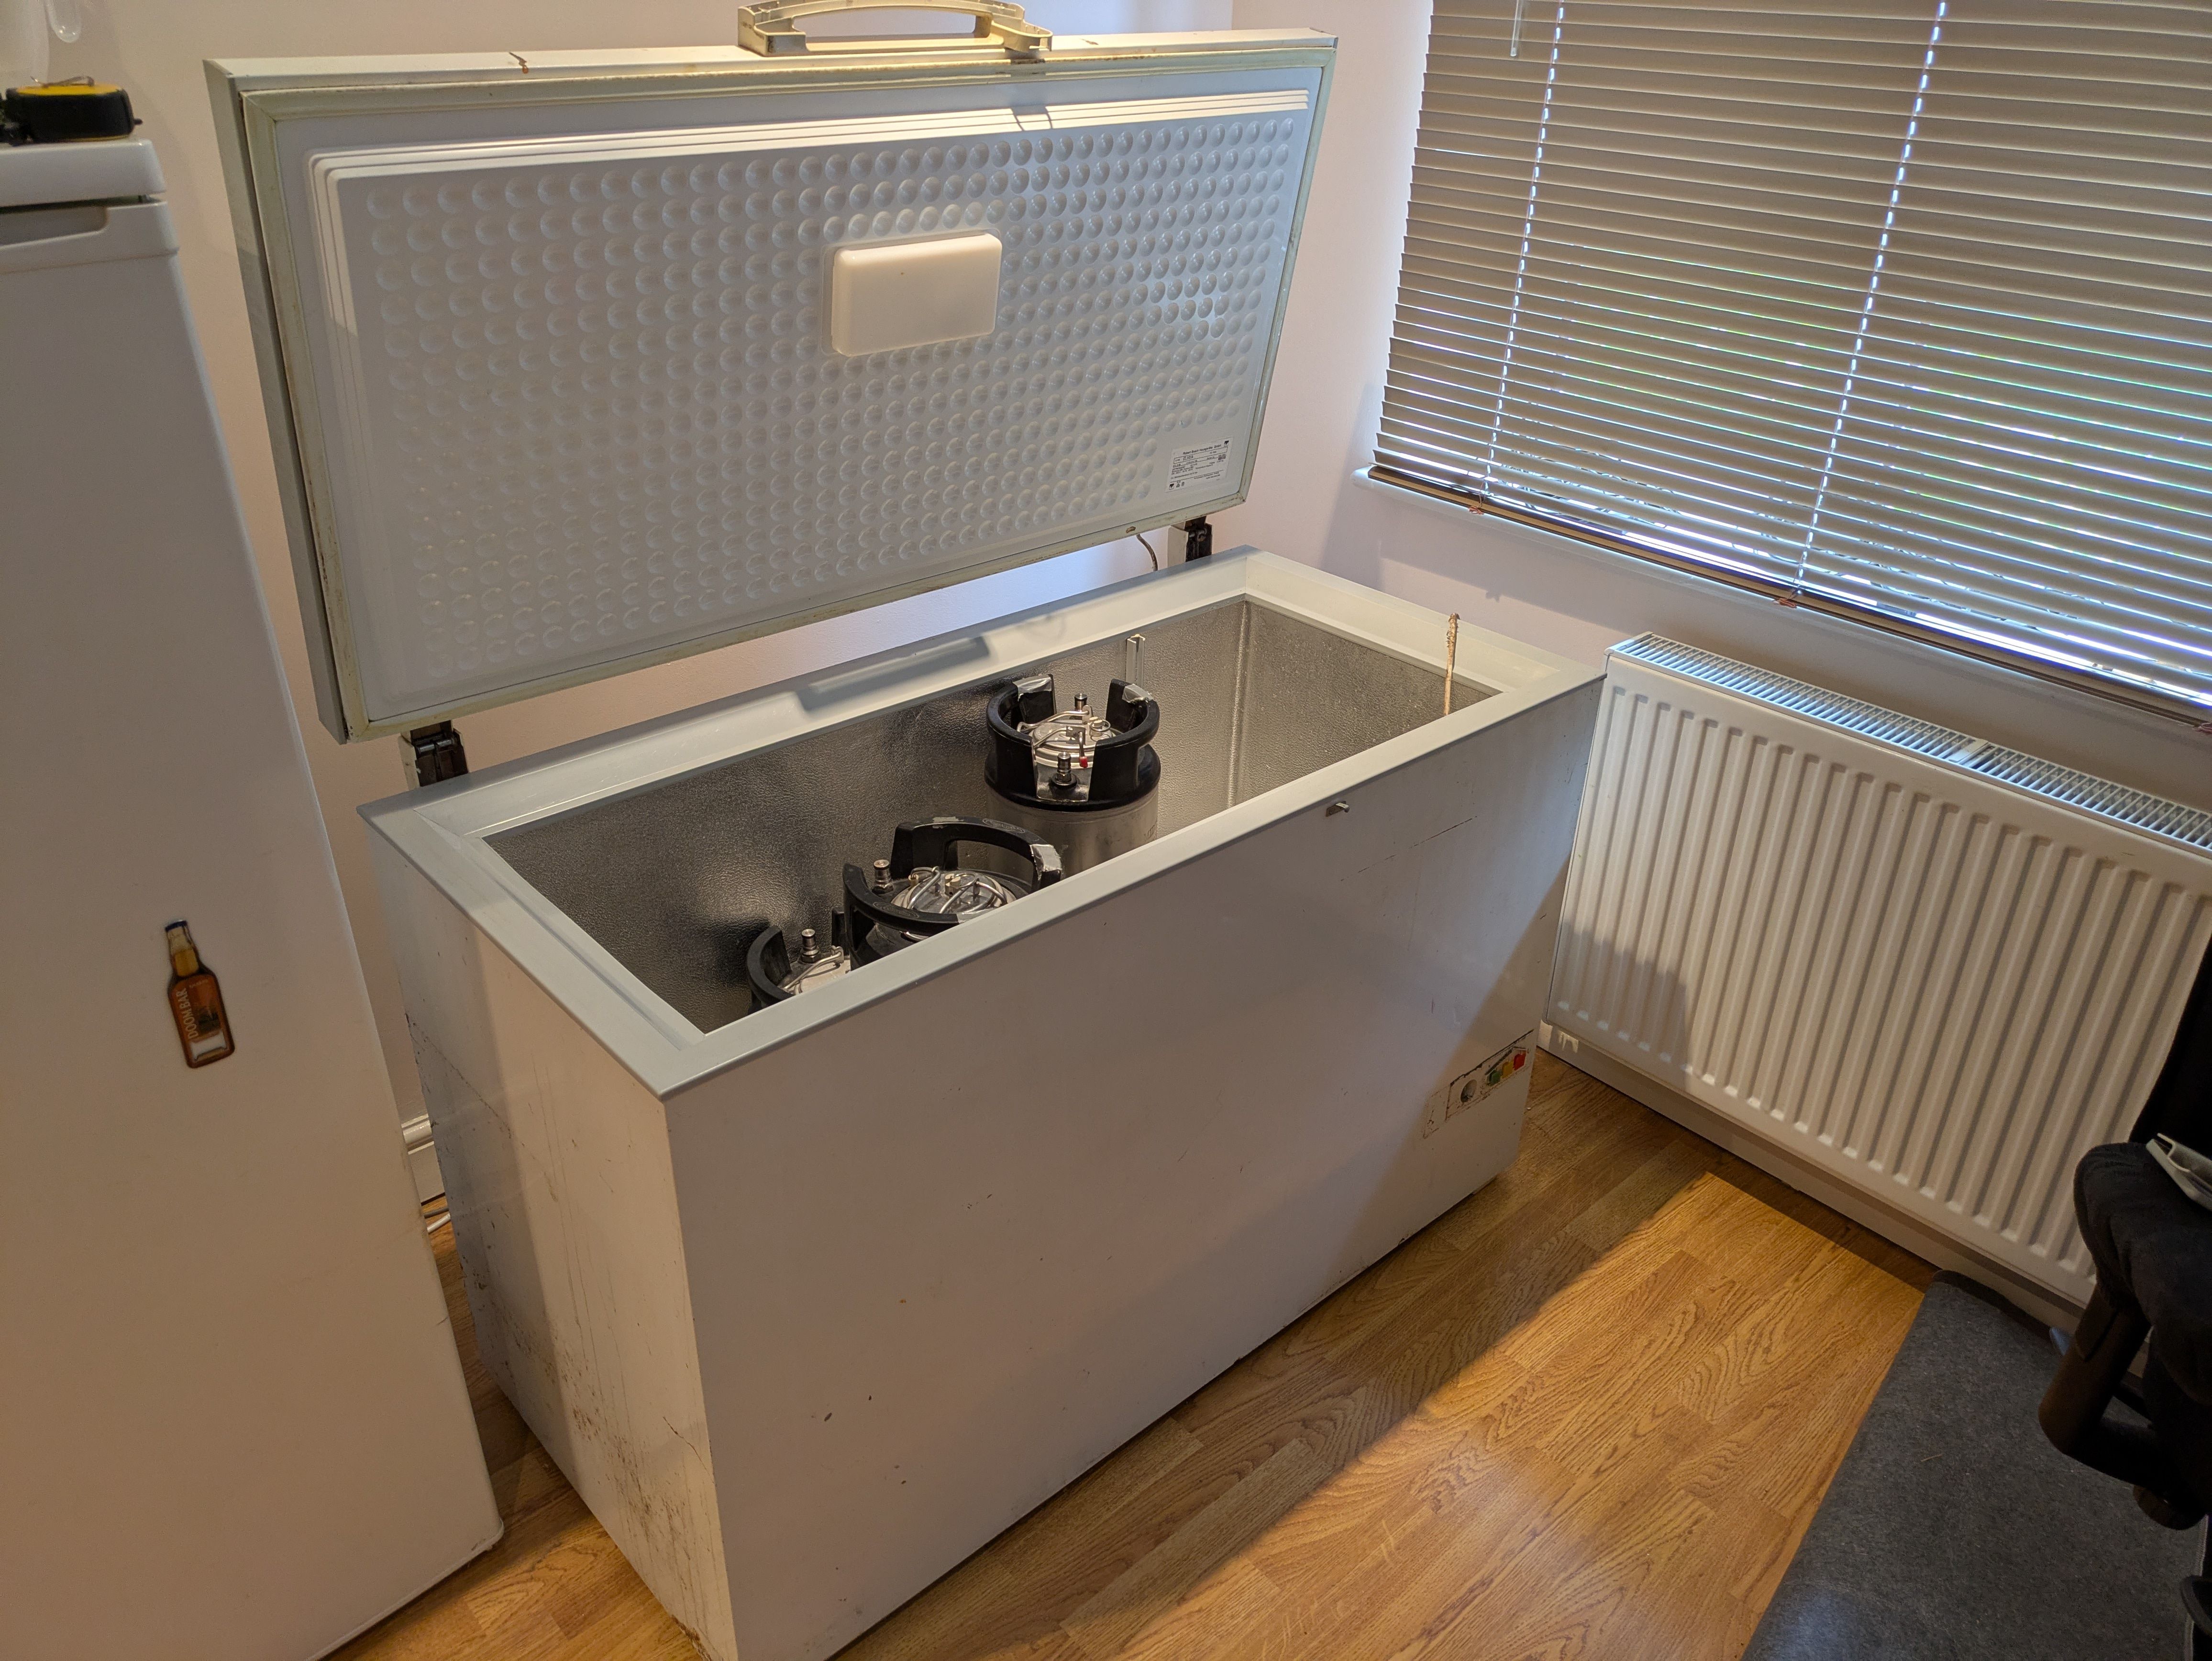
Collar & lid
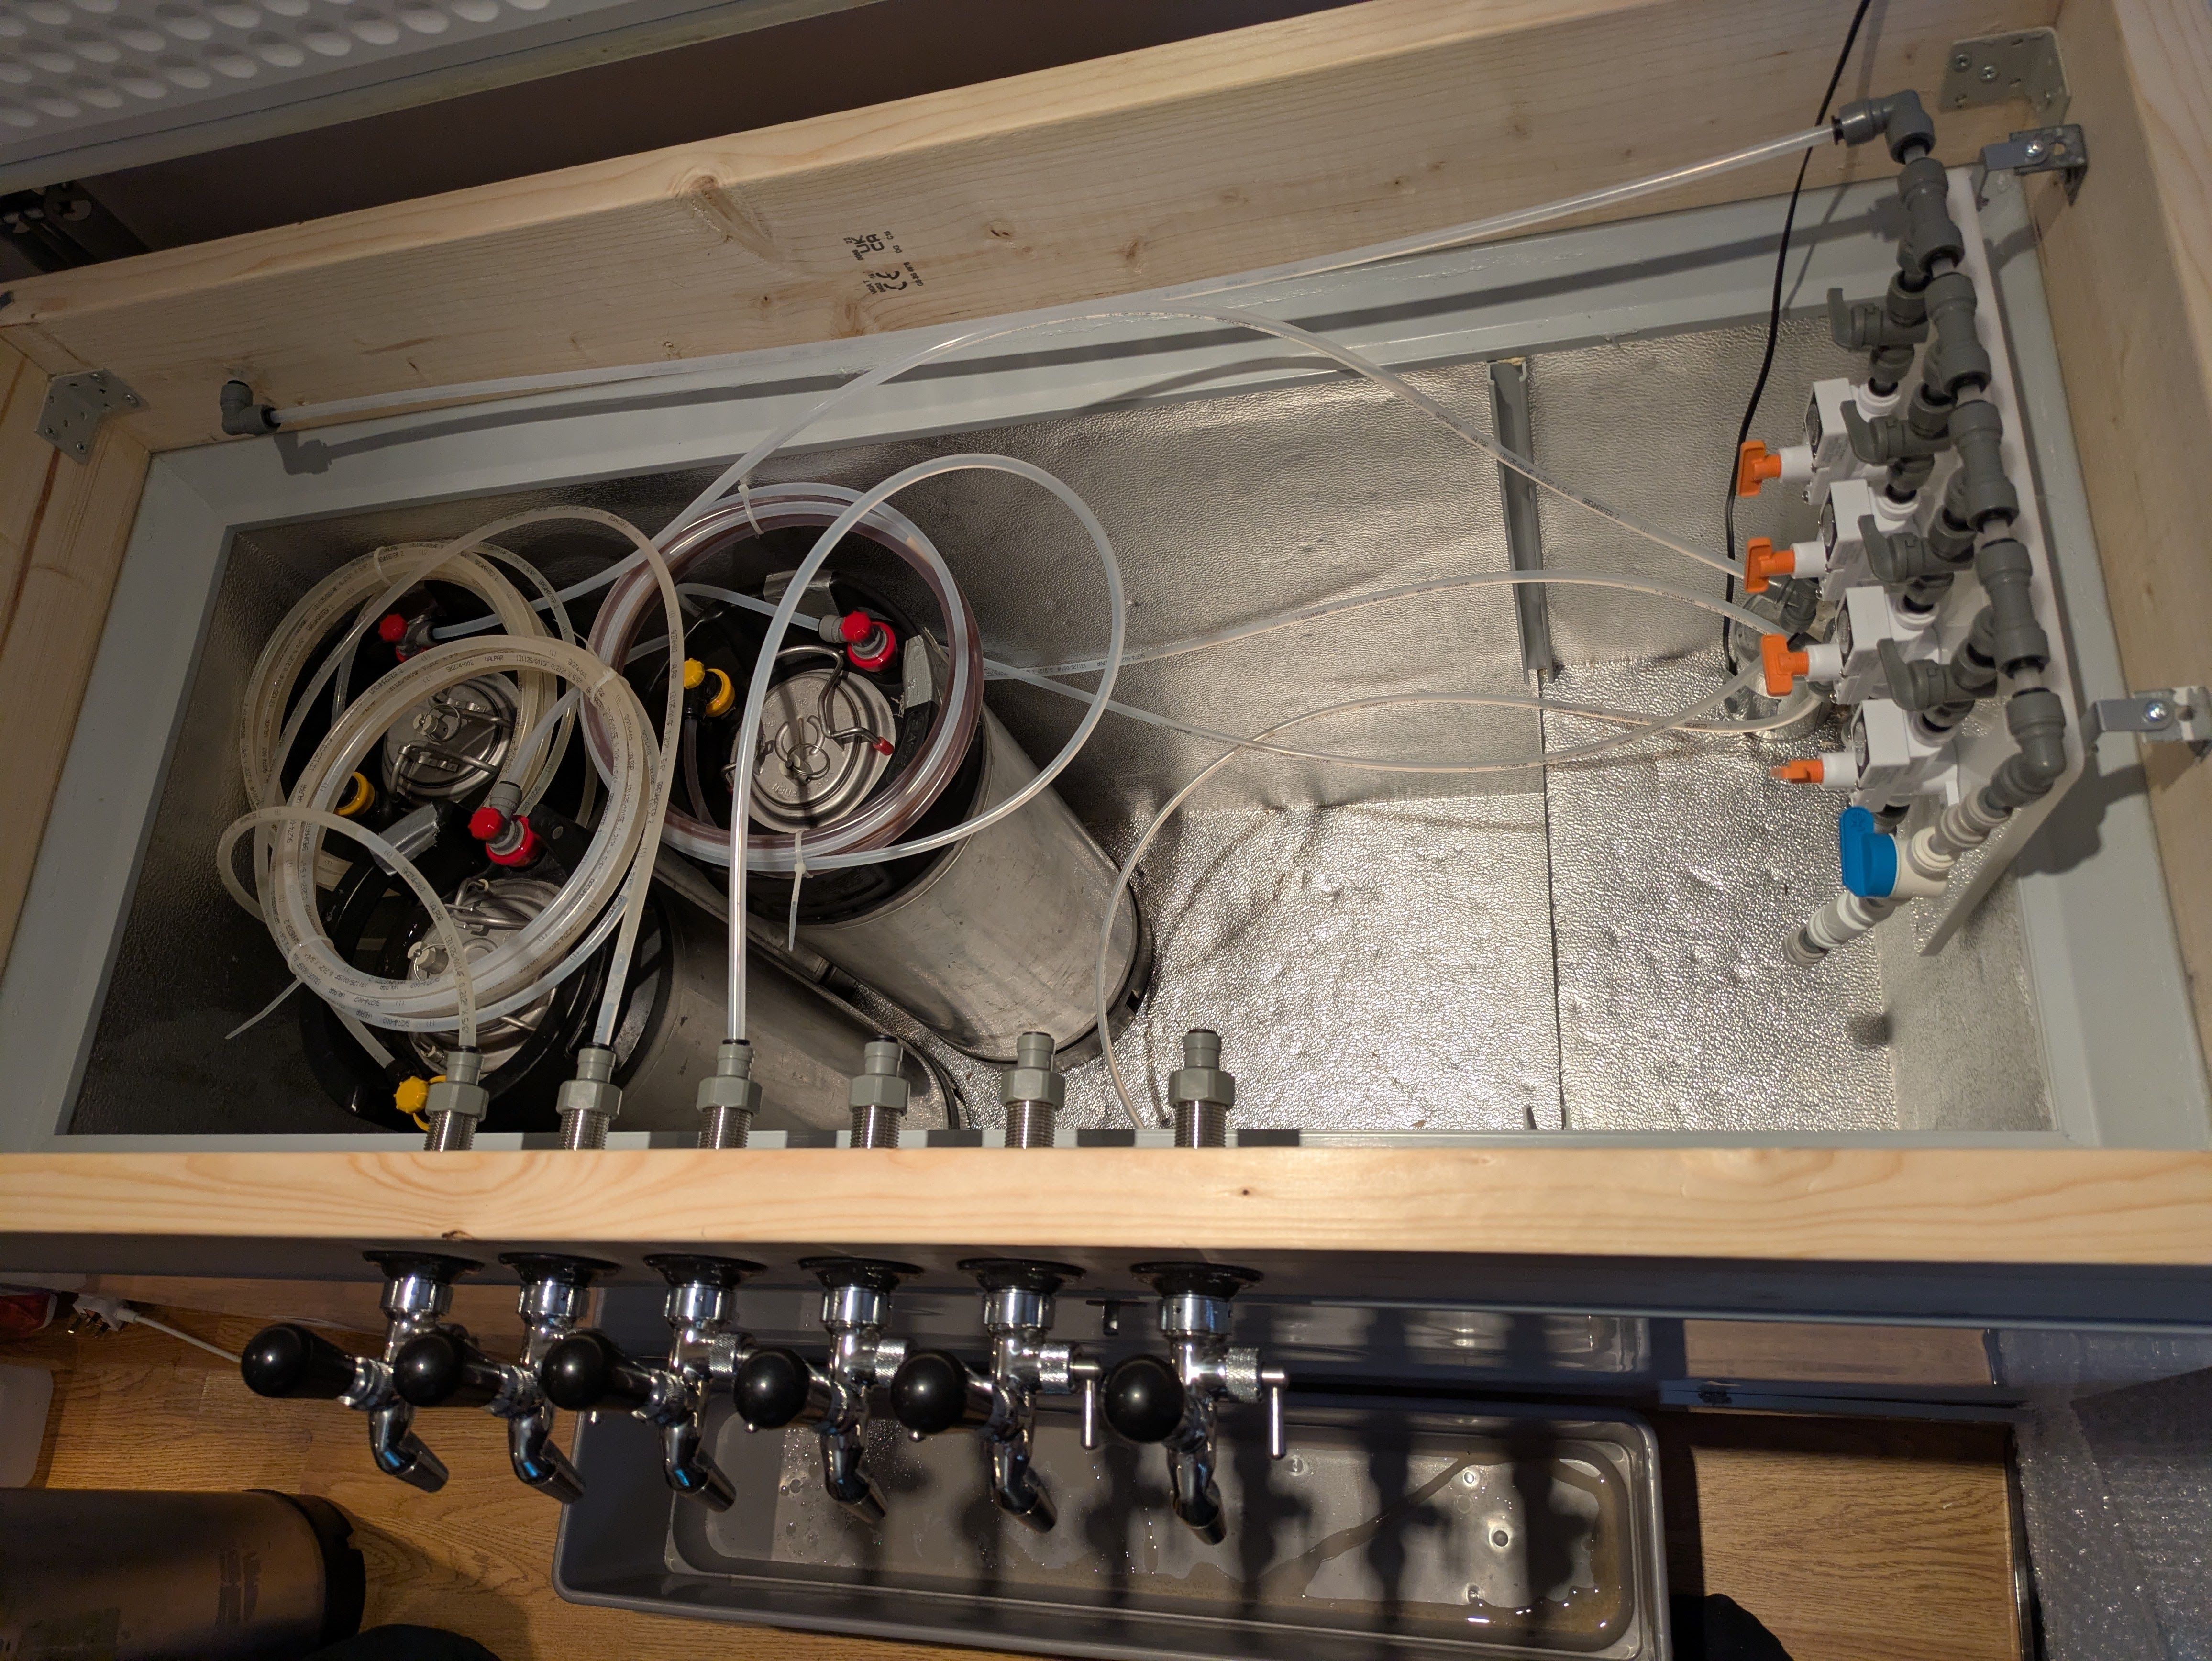
Unlike my keggorator, with which I could drill through the door to fit the taps and drip tray, the only part of the keezer that I could potentially safely drill through would be the lid, and that seems an impractical proposition as I need to lift the lid so wouldn't want any tap fonts fitted there.
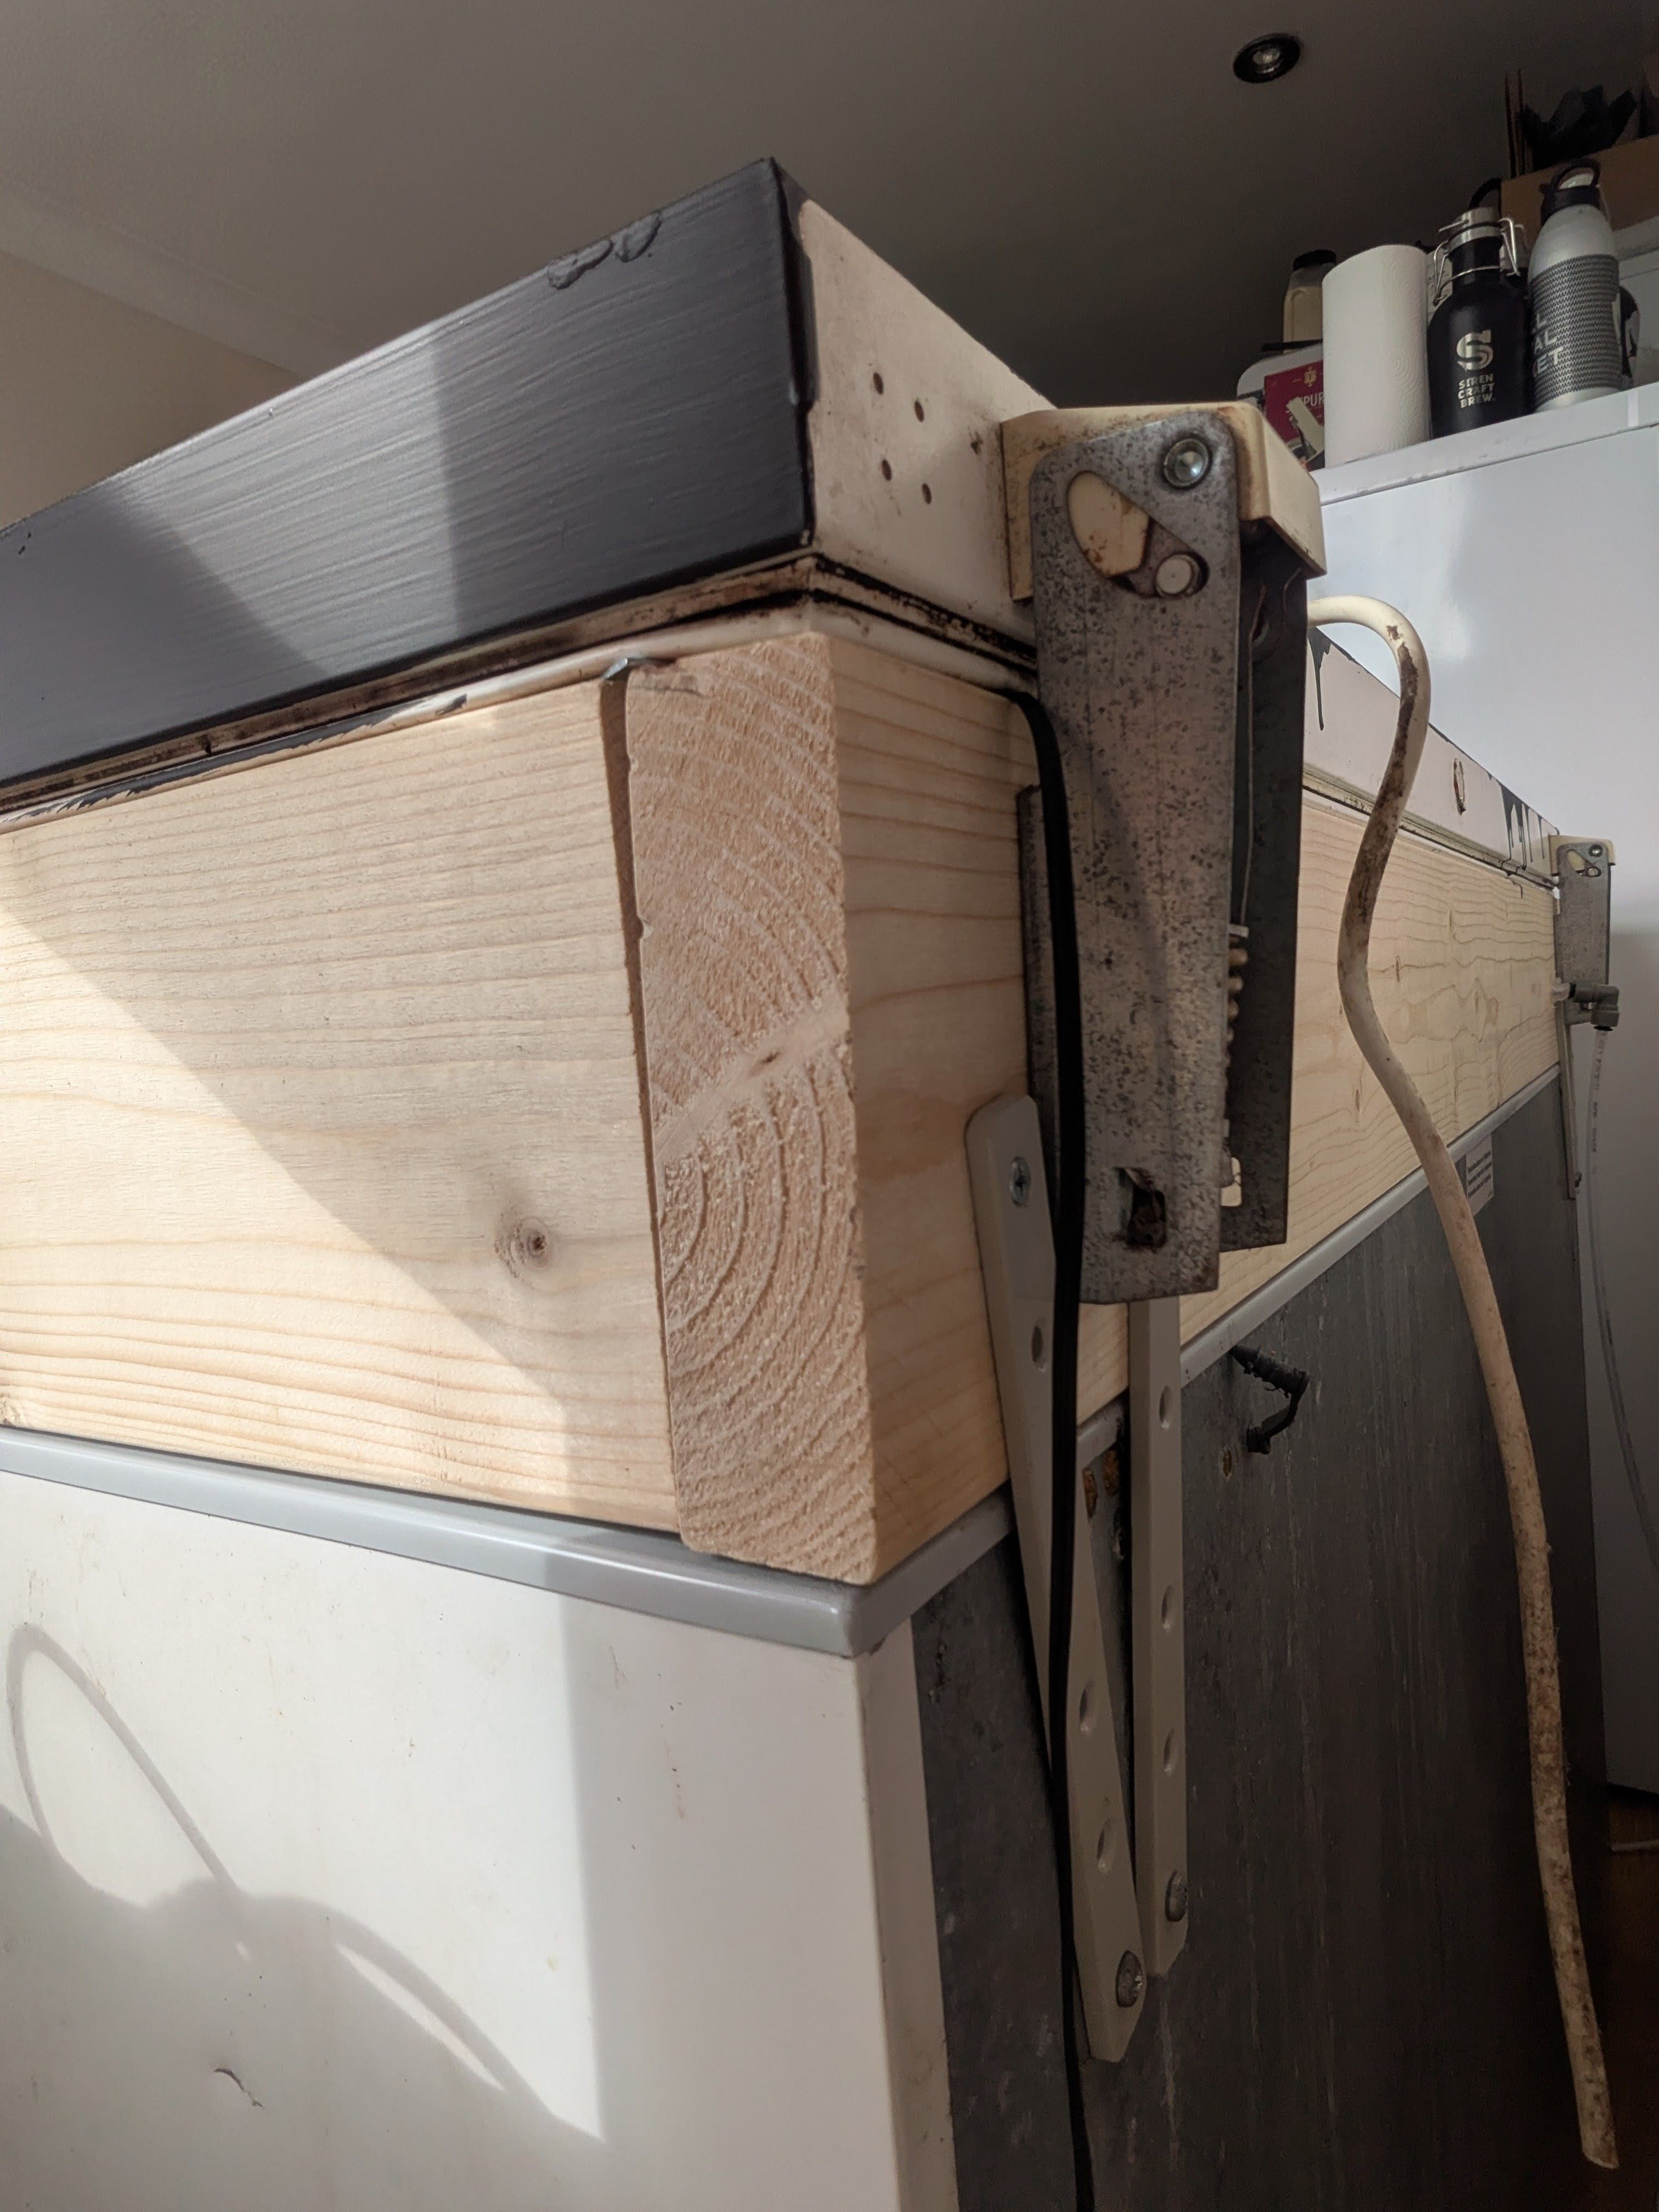
The normal solution to this (having done some research on t'web and talked to fellow RAB members) is to create a "collar" for the keezer out of wood, which would sit between the body of the freezer and the lid (hence the need to remove the hinges). Since it's wood, it can be safely drilled to fit the tap shanks, and will also provide decent insulation.

I measured the top of the freezer, then bought two 2m lengths of 2x6 spruce from B&Q. I borrowed my father-in-law's circular saw to cut them to length. After balancing them on top of the freezer to make sure they fitted correctly, I fastened them together with right-angled brackets on the inside. This gave reasonable attachment, but it was a little wobbly, so I added some extra "L"-shaped brackets on the top of the corners to give additional rigidity.
Eventually, after I'd done everything else described below except the painting, I used an indoor general purpose silicone sealant around the joins between the wood and the freezer, and in the corner joins between the planks. After all of this, it's solid enough - I'm sure I could break it with enough sideways force, but it's not going to go anywhere with normal use.
At the rear of the keezer the lid is screwed to the collar, and I used some metal "straps" from B&Q to firmly attach the body of the freezer to the collar.
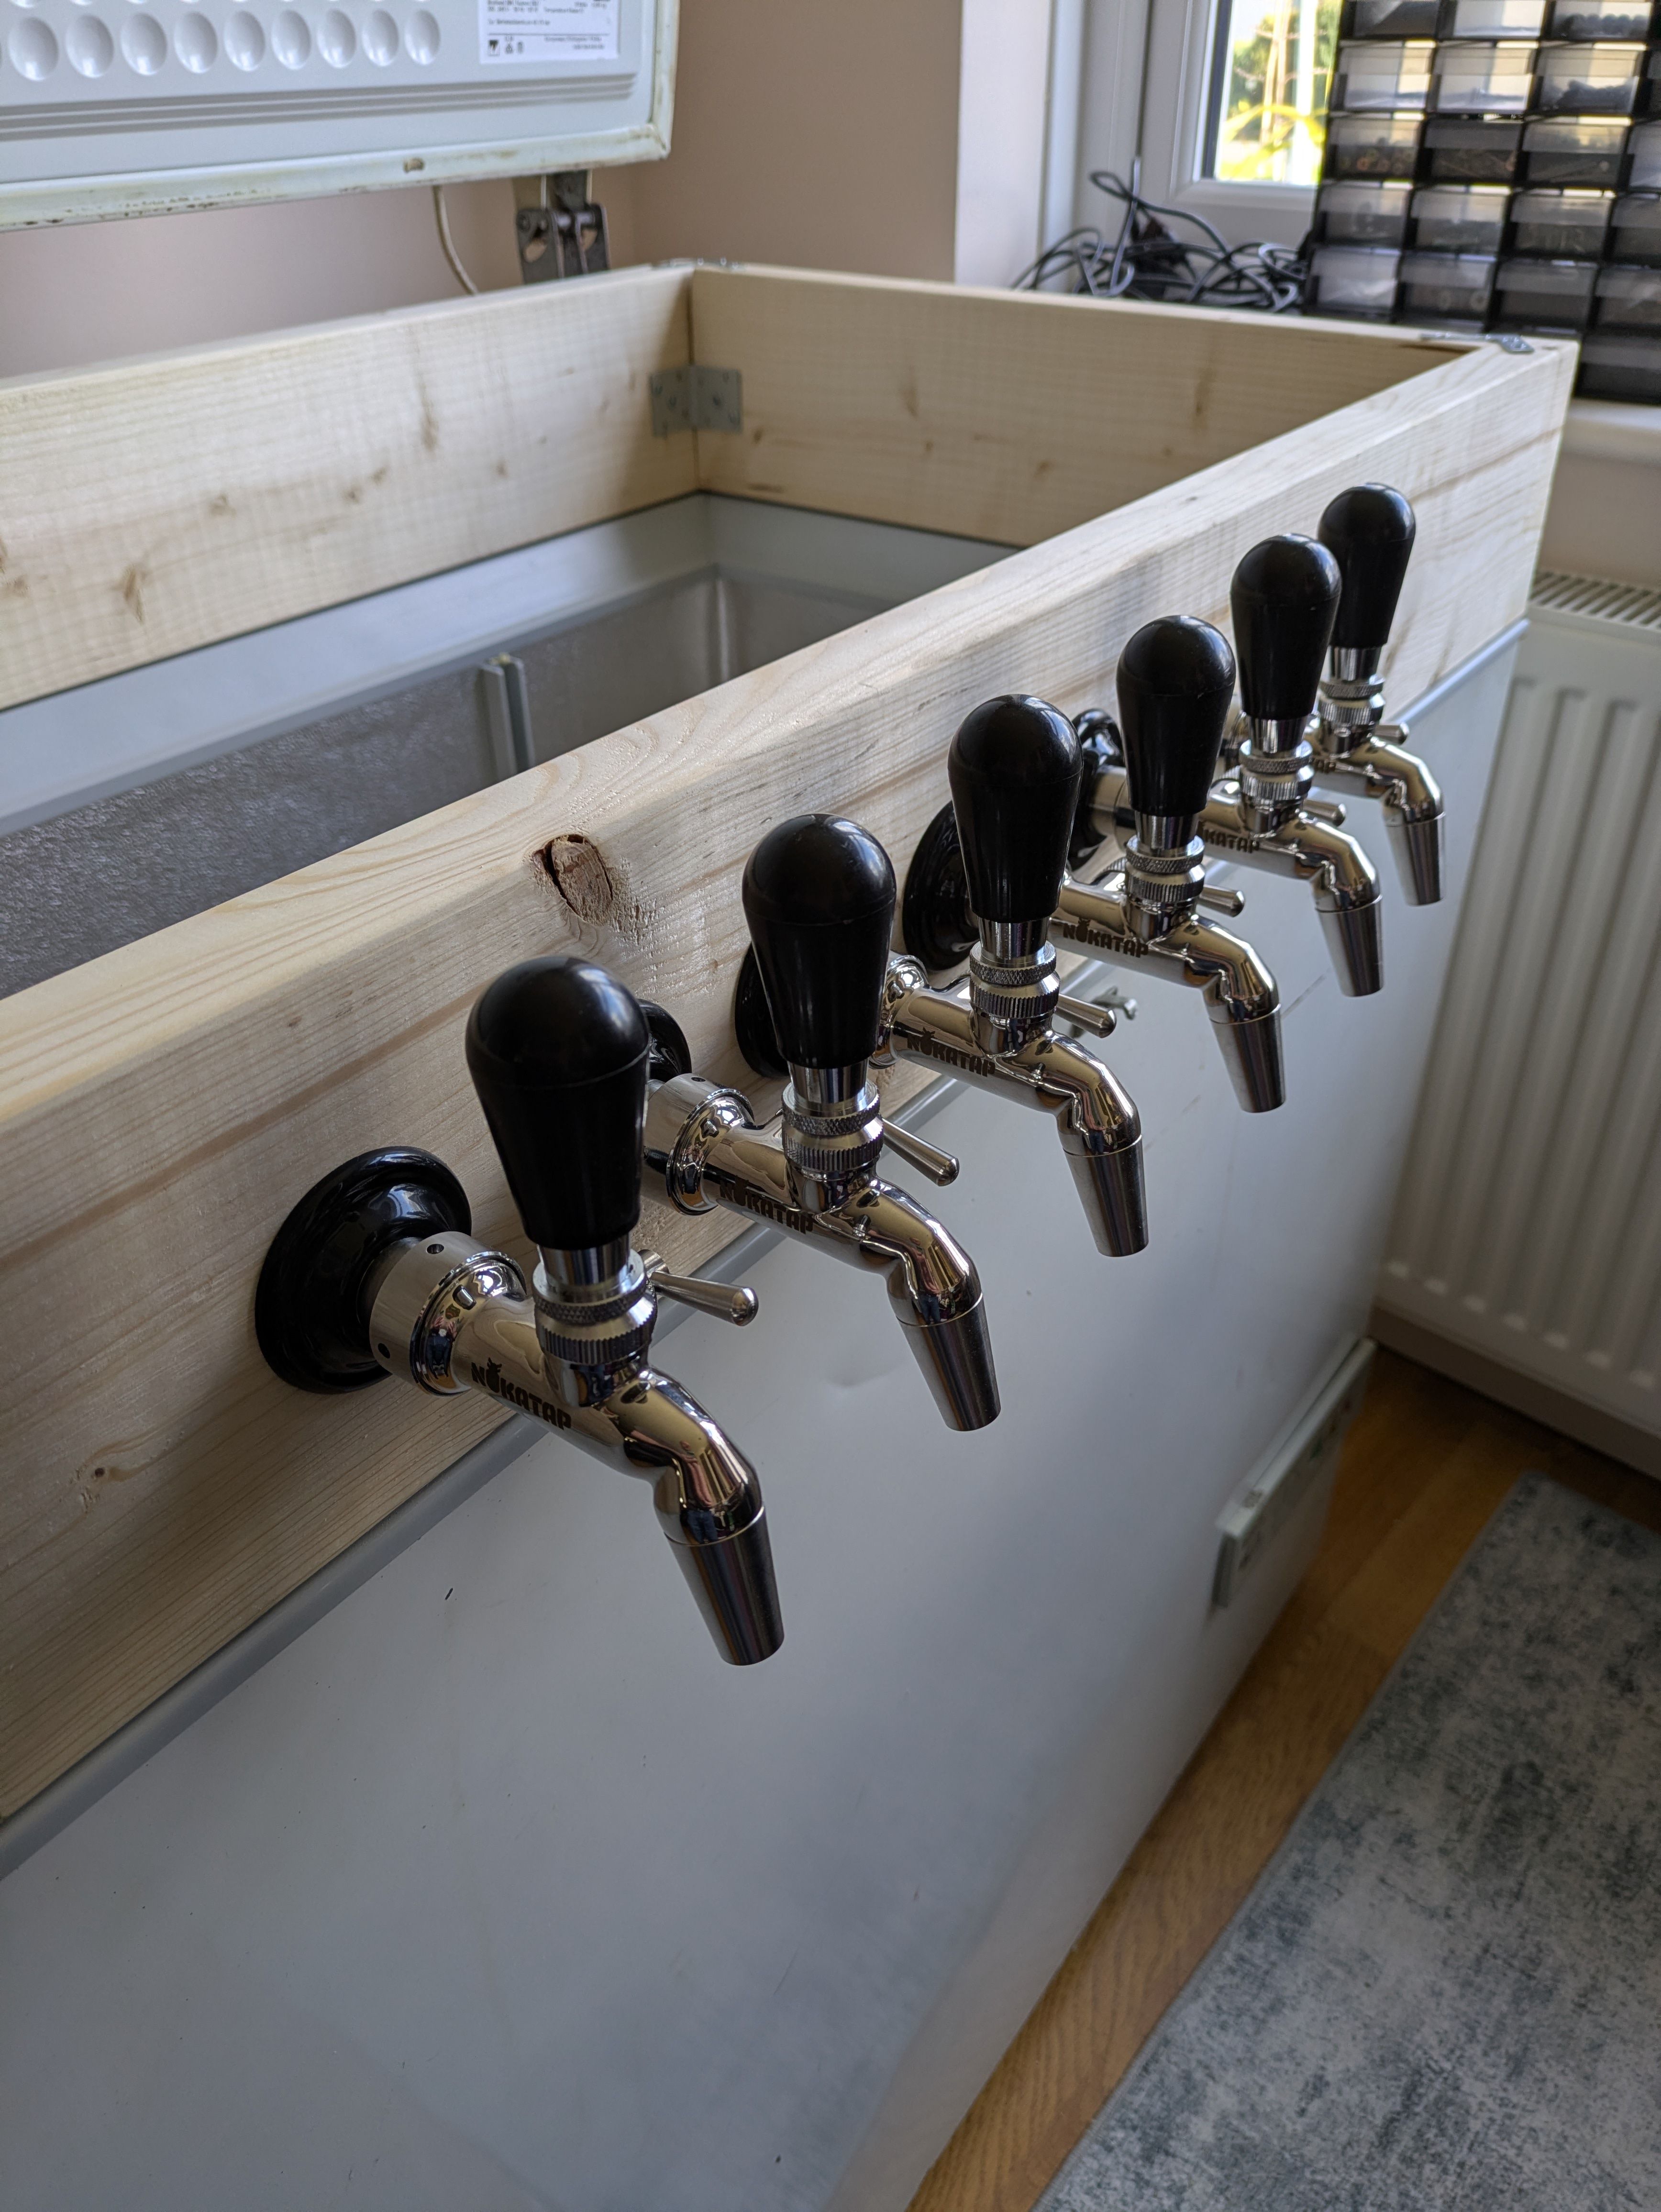
Holes, shanks, and taps
My next task was to fit the taps. I started by marking the centre of the width, then making marks at 3 inch separations (enough distance to be able to use, remove, and re-fit the taps). I drilled pilot holes at each of these locations, then using the same hole cutting drill bit that I had from my kegger build, I drilled out the holes for the shanks.
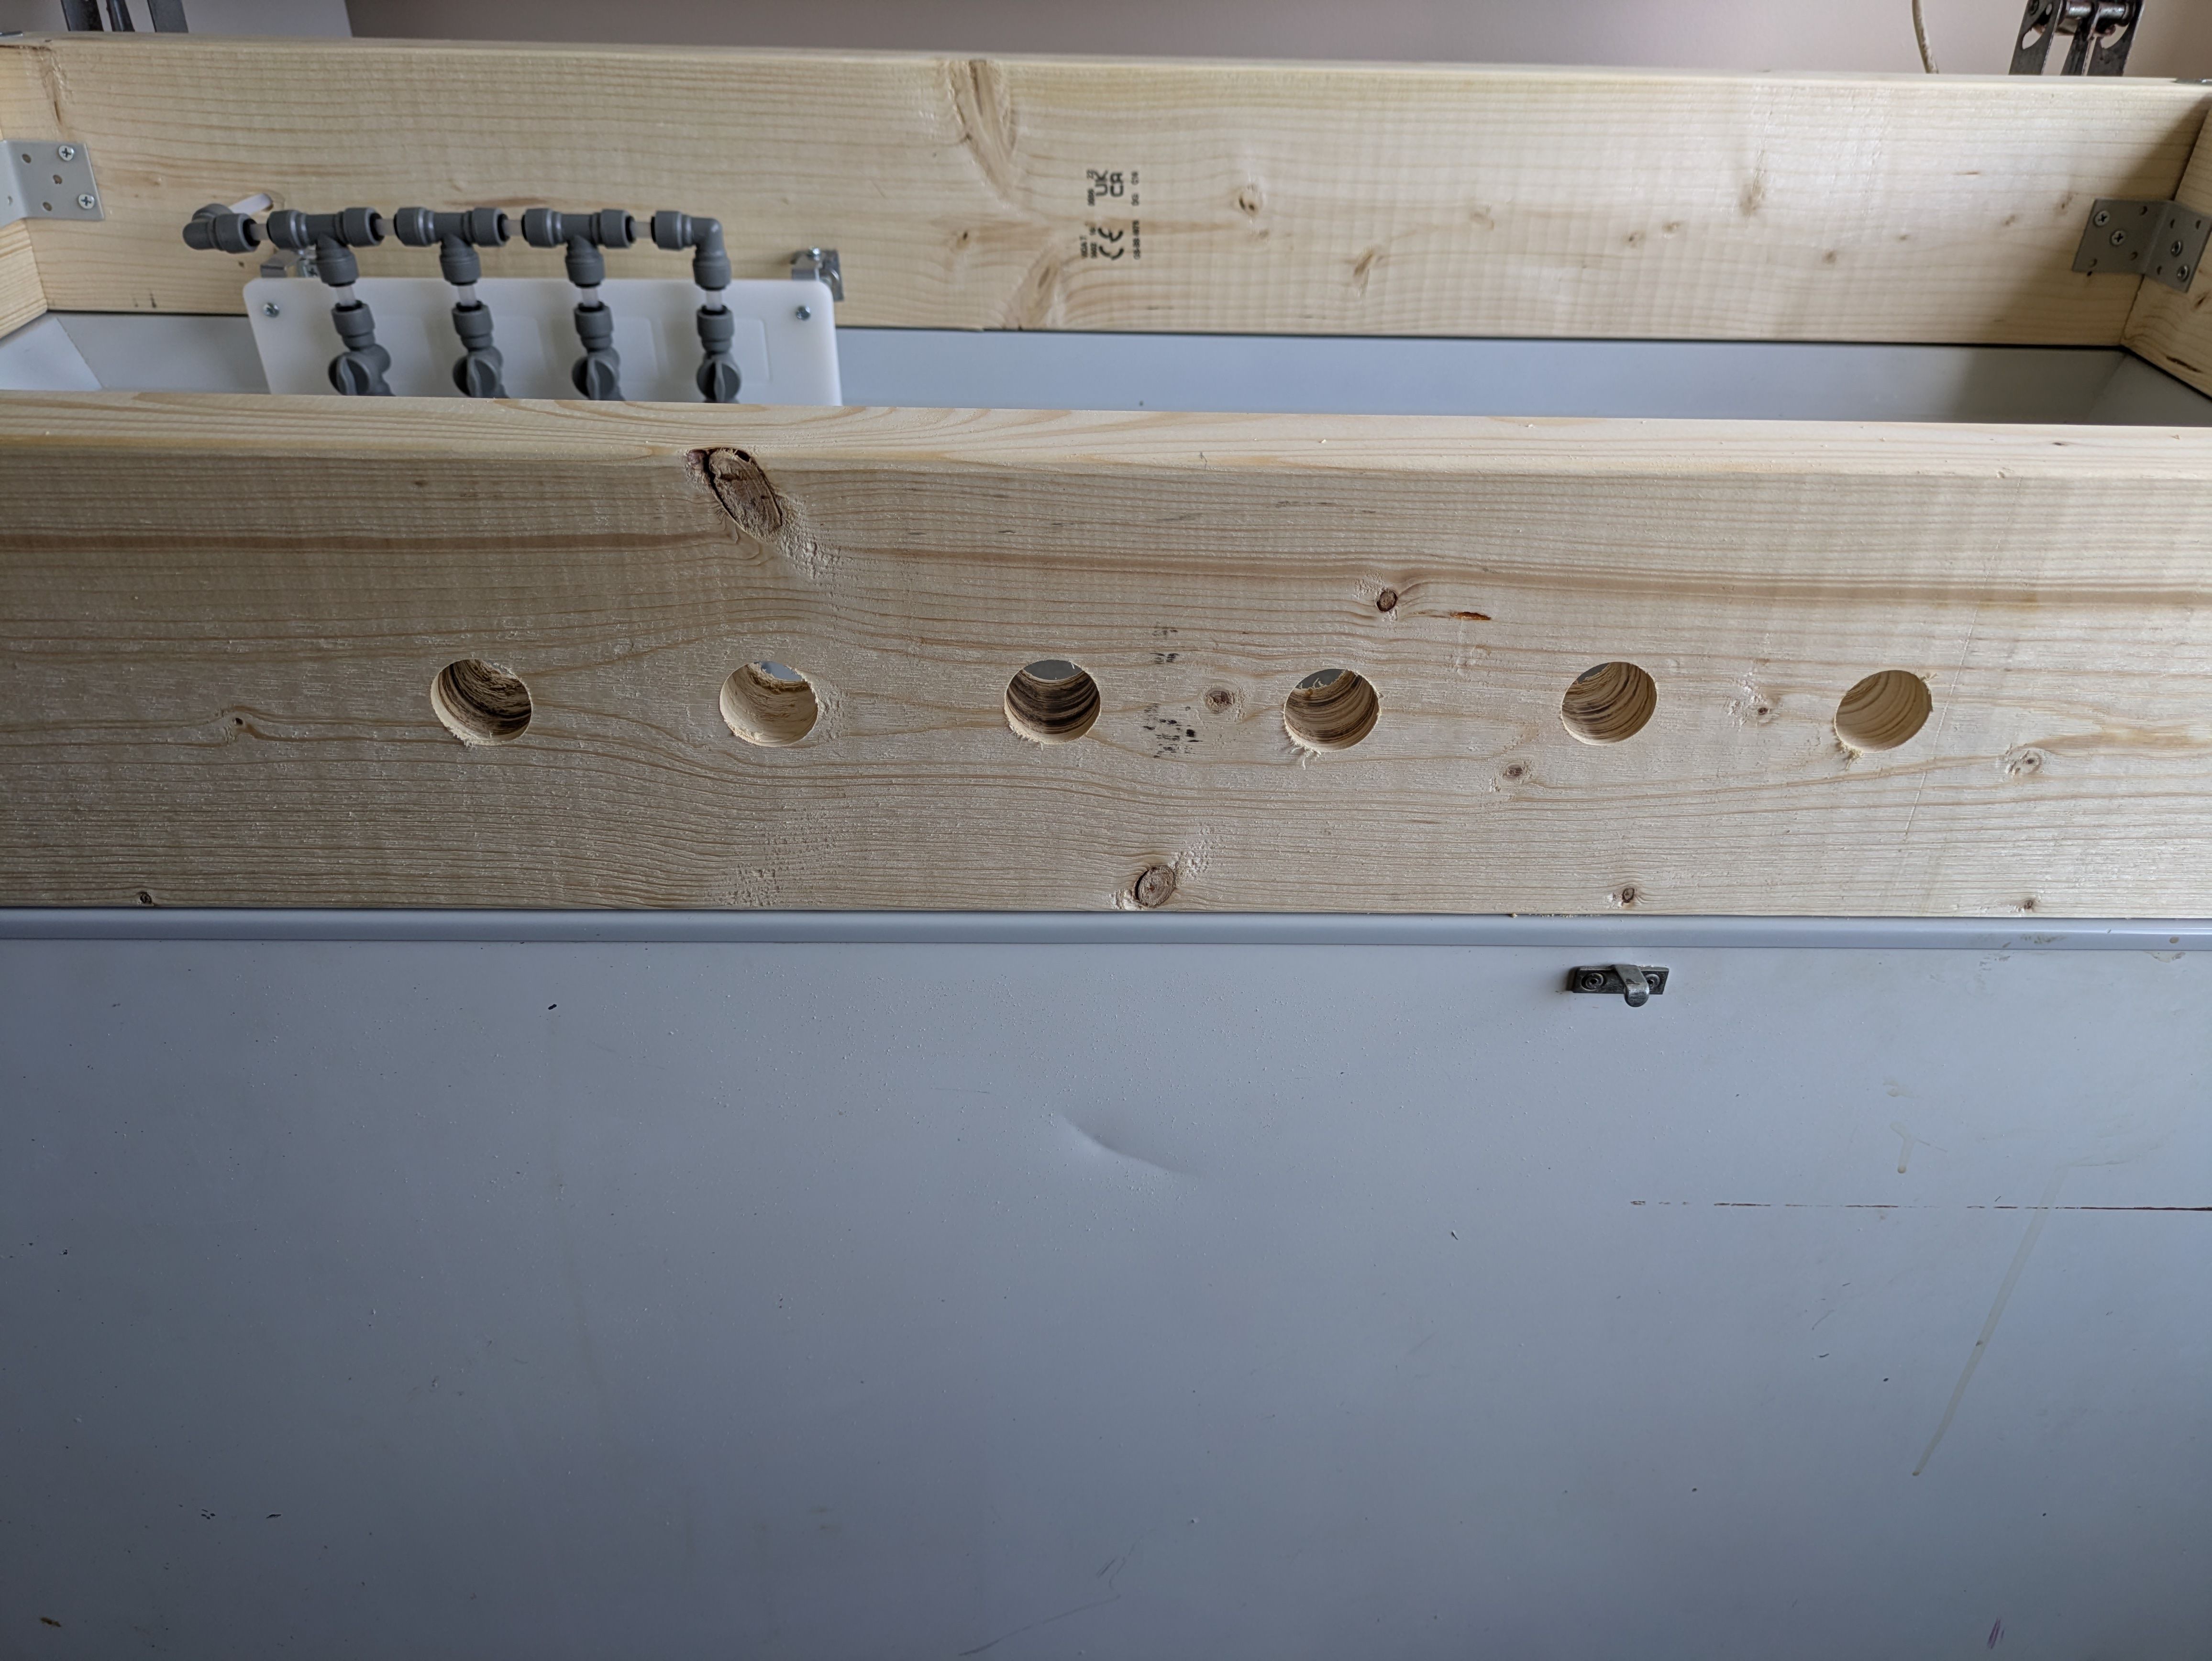
I bought a pack of a NukaTap, shank, and fittings from The Malt Miller for this build. The shank length was perfect for the depth of wood, and there's a DuoFit shank-to-8mm-tube in place ready for beer line.
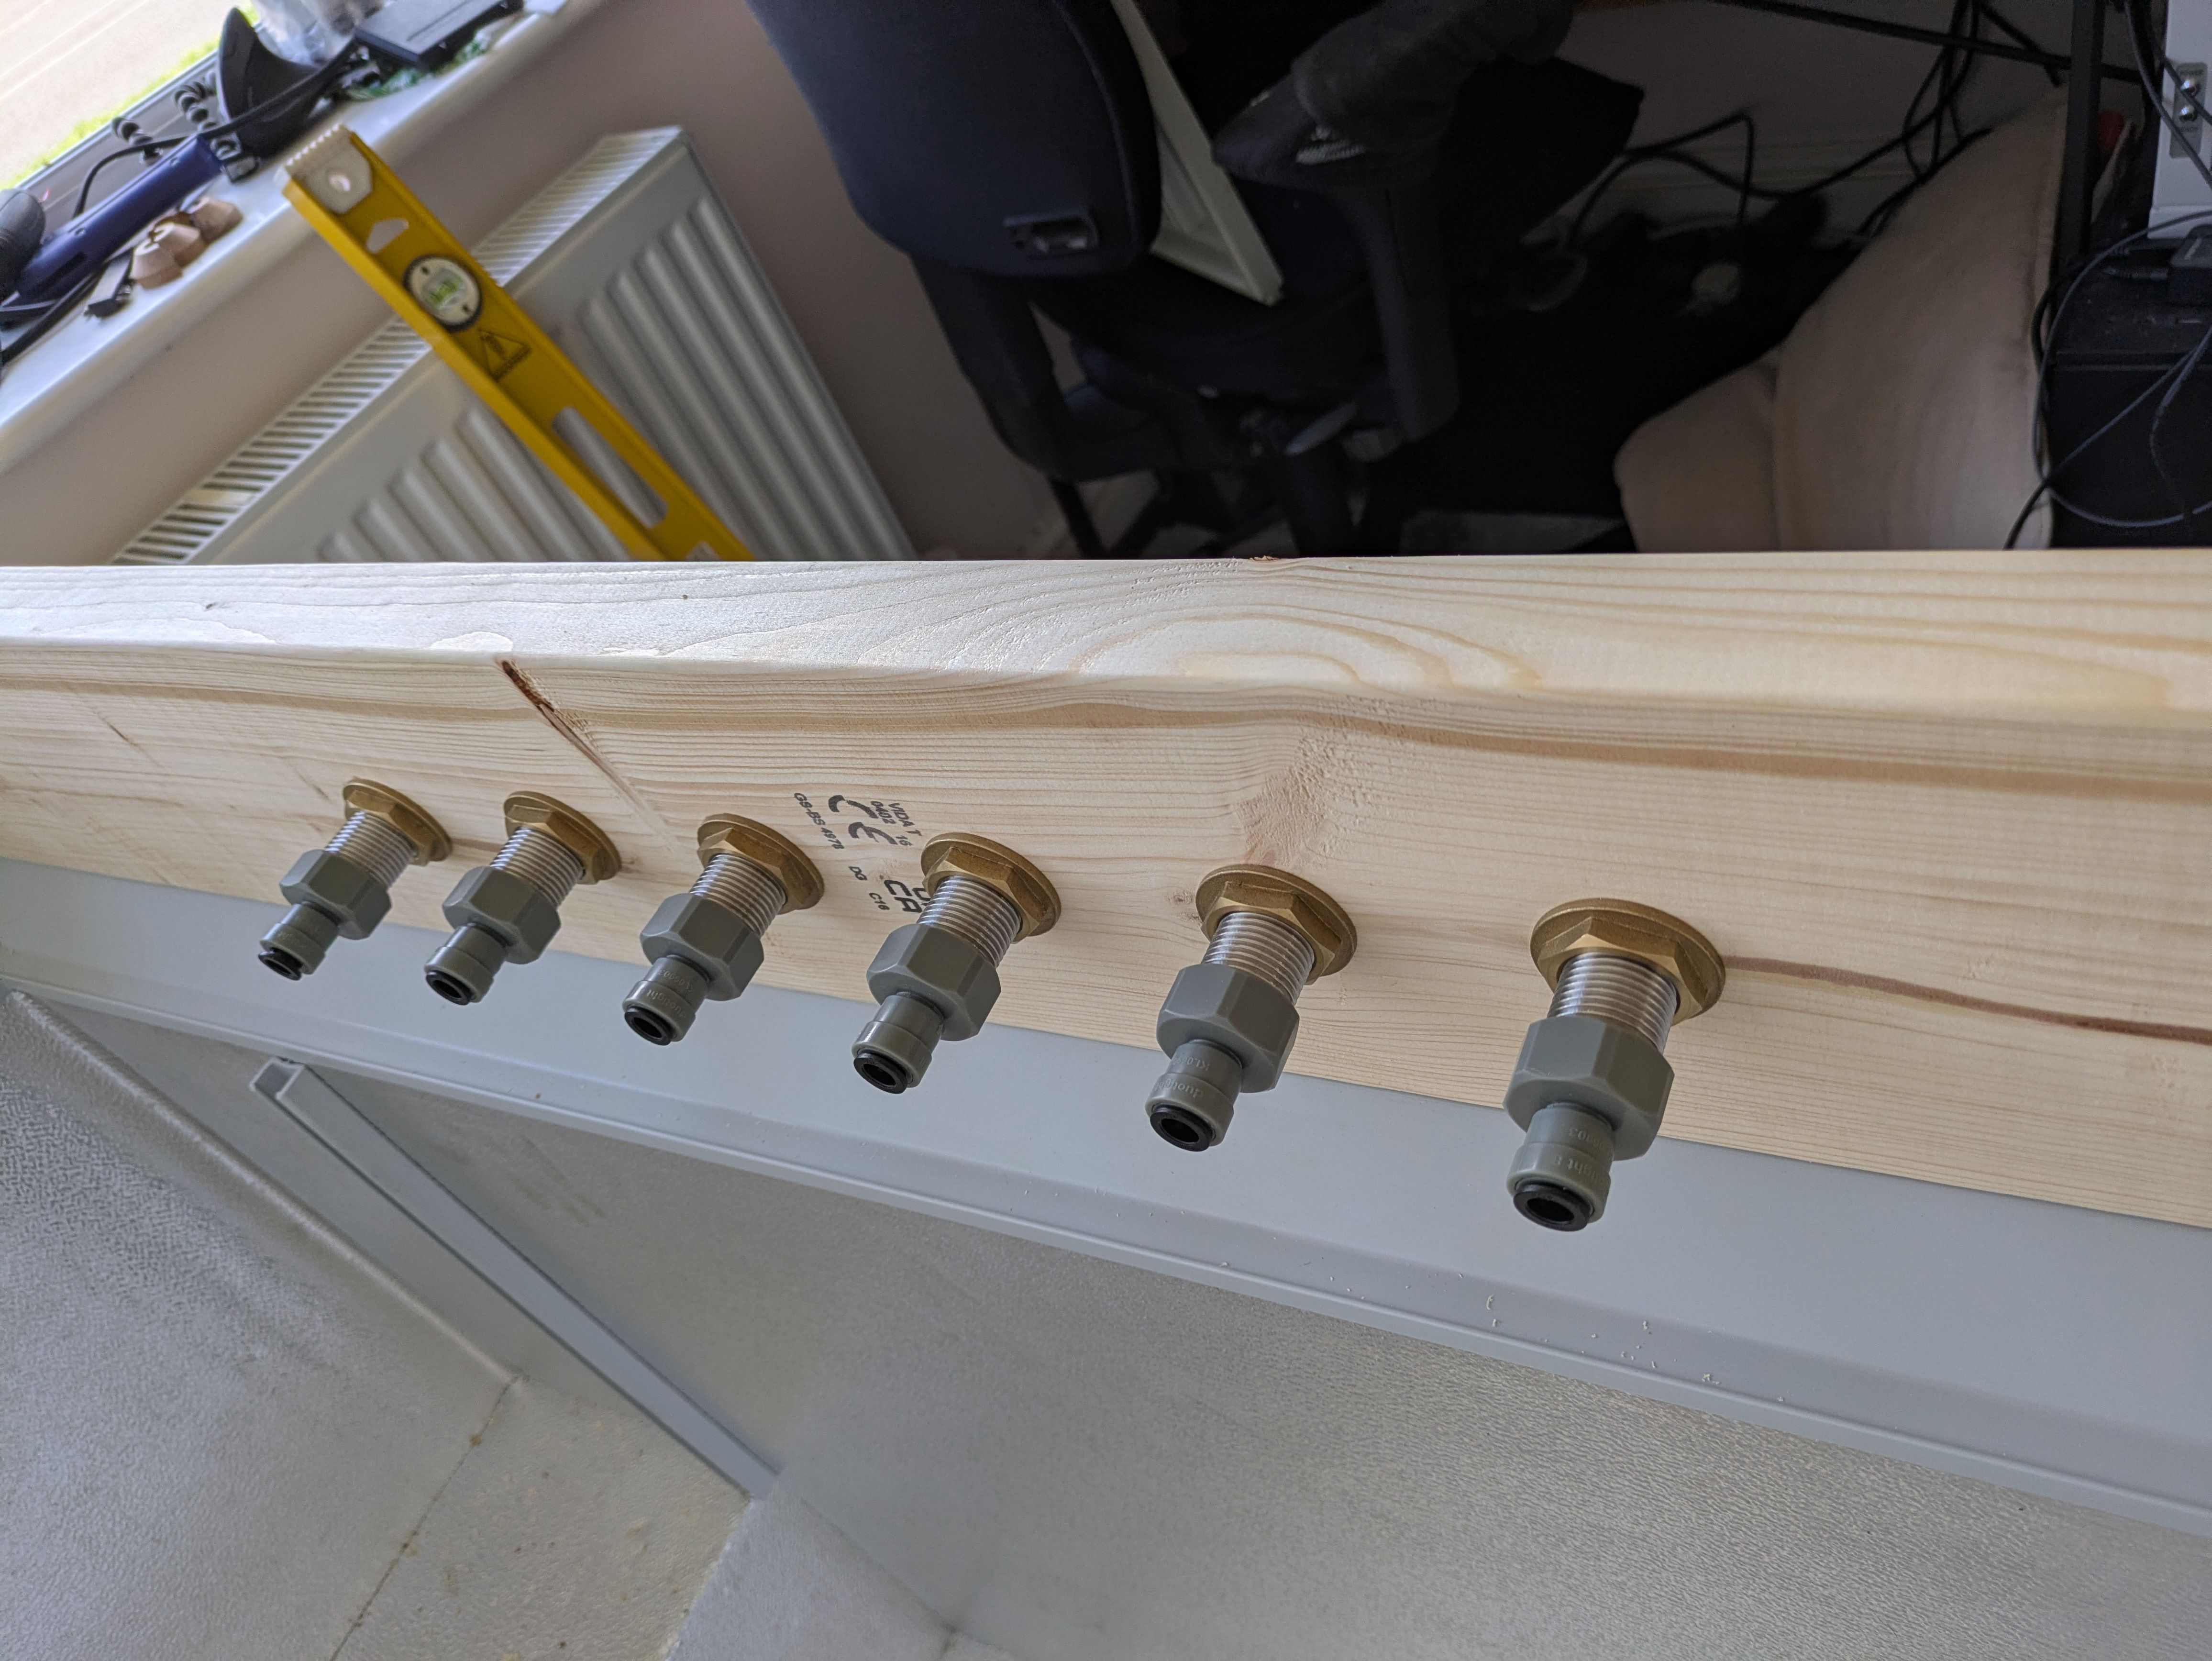
Then it's just a matter of checking the taps are screwed together, and fitting them to the fronts of the shanks.
Gas Board
My keggorator had two gas pressures, but I wanted more, so rather than just having "lager" and "ale" pressures, I could have low pressure for just pushing wine without carbonating it, and higher pressure for soda water, or whatever else I fancy! Having spotted another useful kit on TMM, I bought this gas board that uses the Kegland mini-regulators and DuoTight fittings:
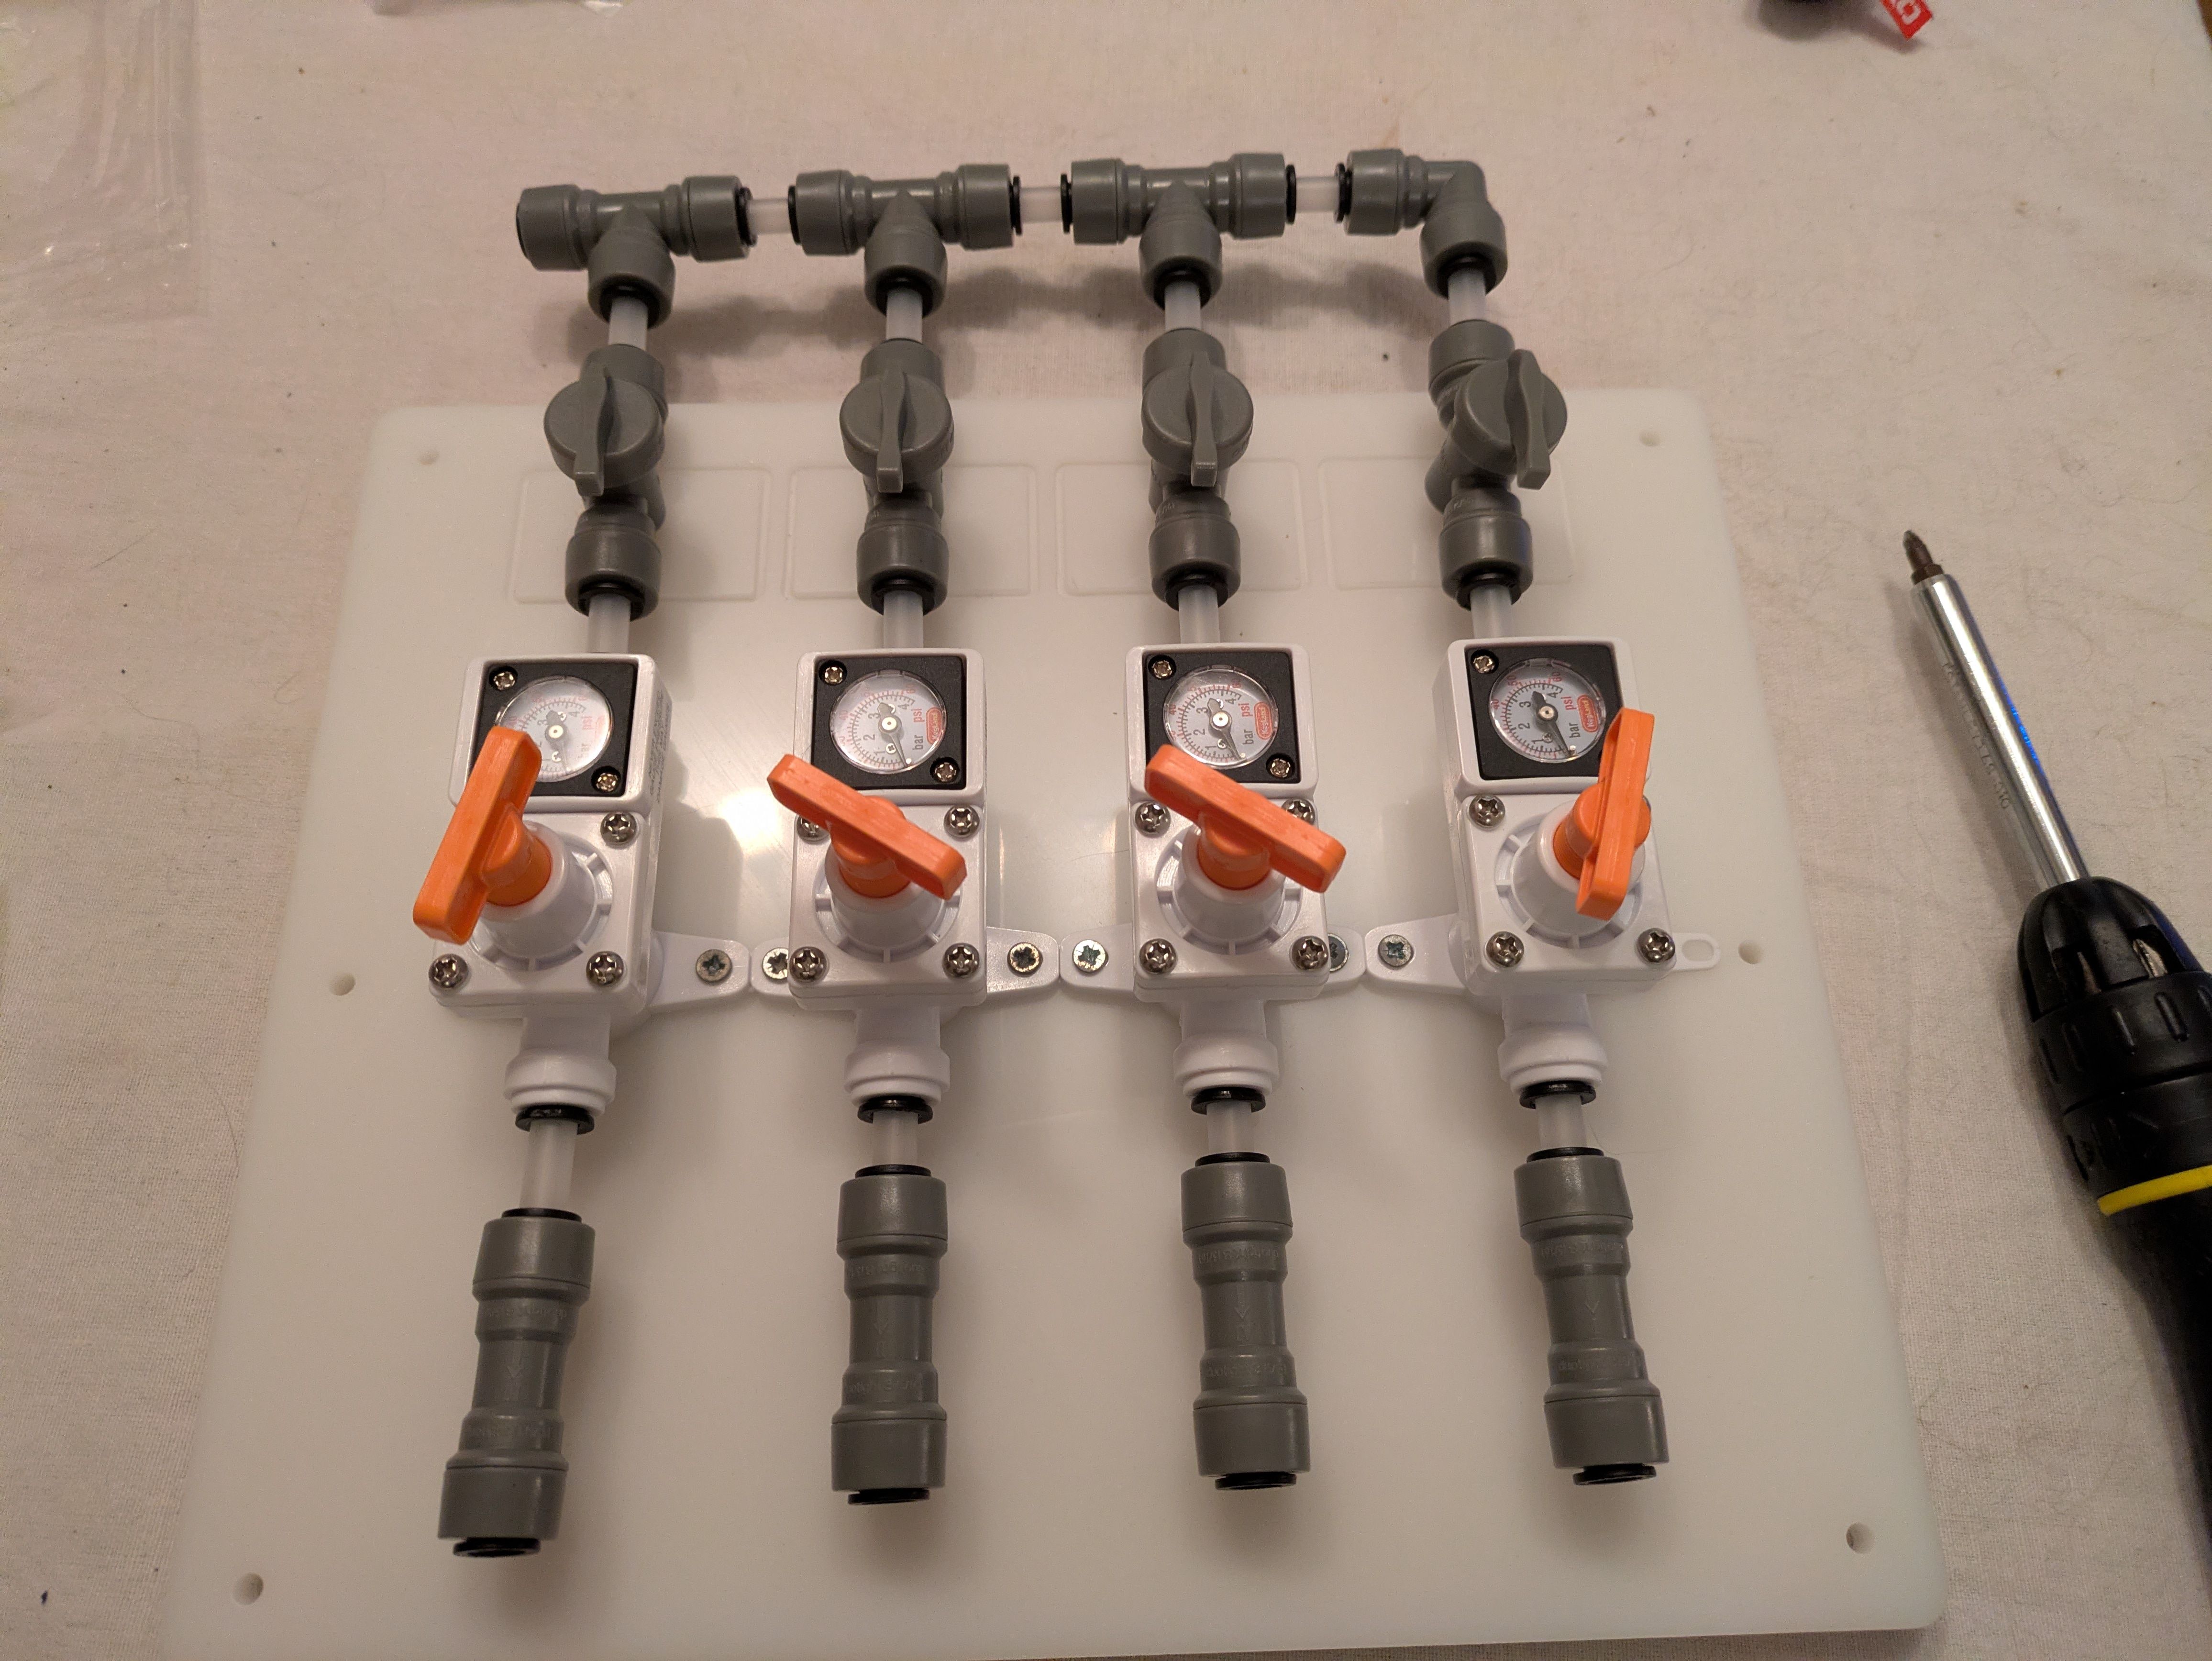
Spot the (non-)obvious flaw.... I originally put the regulator control after the gauge, which means it's measuring the pressure from the supply rather than the pressure in the keg. After pulling it apart and putting it back together the other way up we have the final gas board. That's quite a lot of joins to check if I decide I have a leak, so let's hope it's gas-tight!
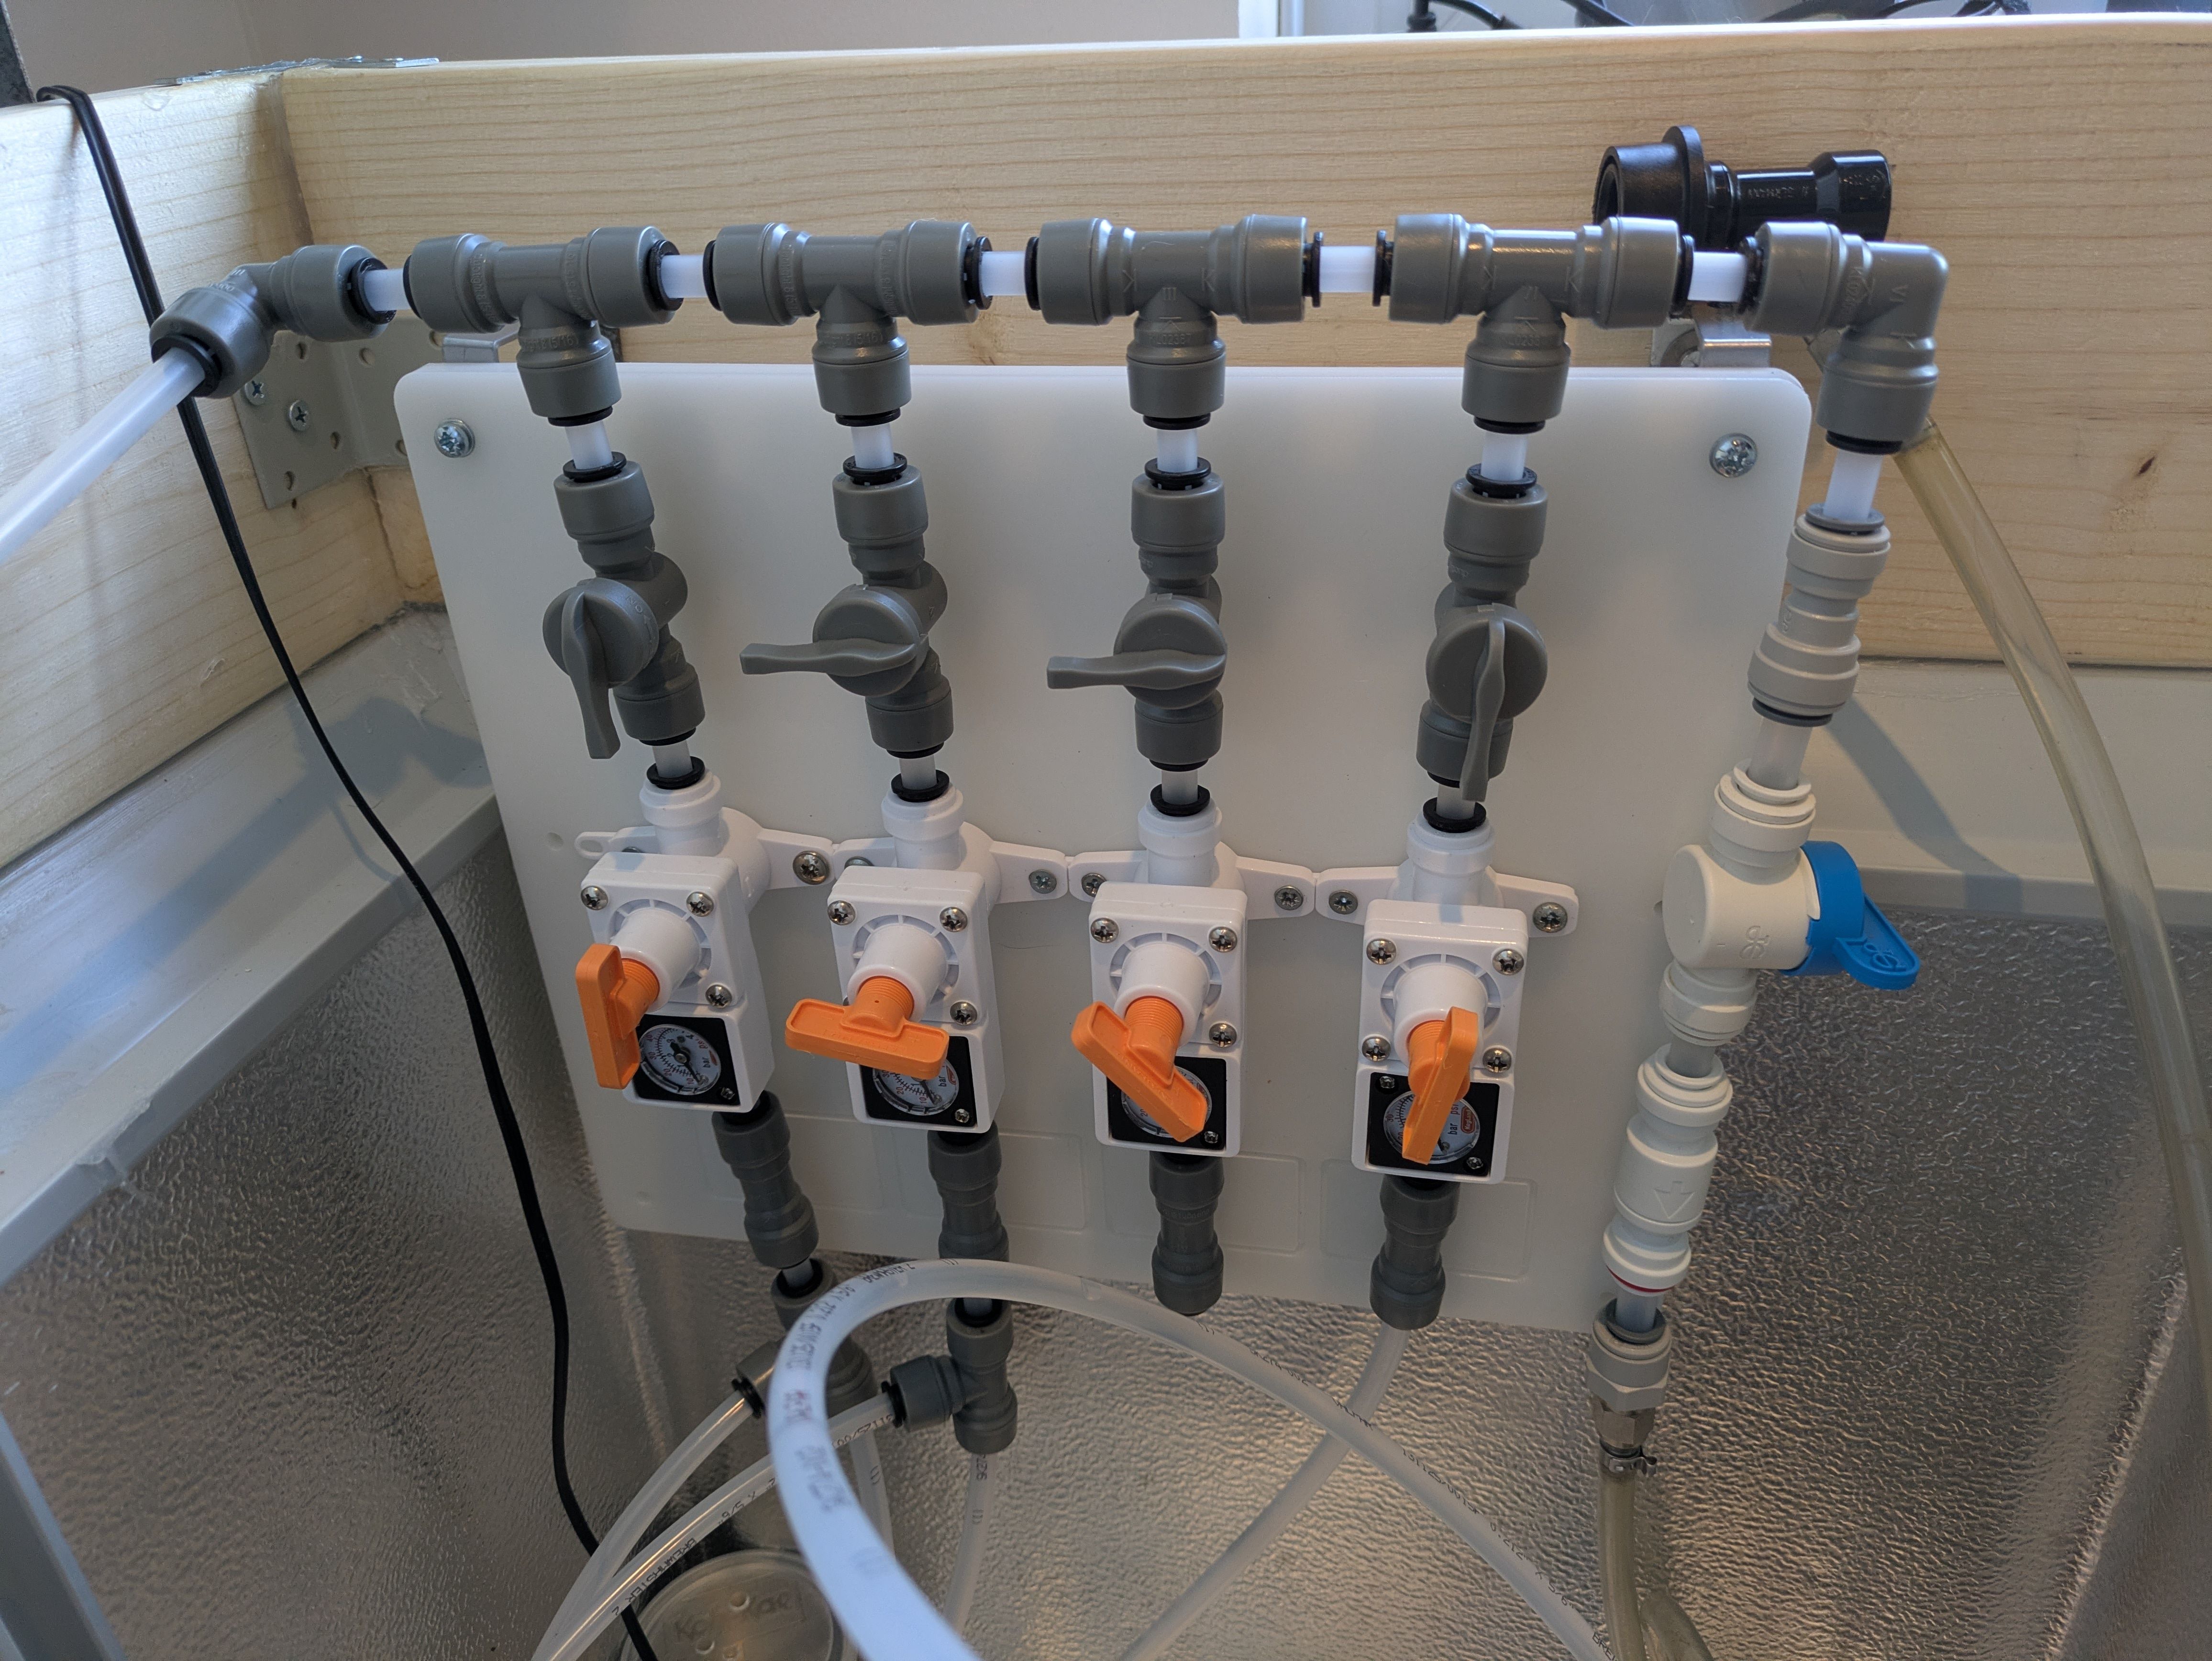
I originally placed the gas board at the back left of the keezer, but when I started adding kegs I realised it would reduce the number I'd be able to fit as it would get in the way, so I re-sited it to above the compressor. I'd already drilled a hole for the gas line, and rather than filling it, I've just used a couple of elbows to run the gas line from the original hole to the gas board's new location. This is a little tidier from the outside as well, as it means the gas line is entering the keezer from the side the gas bottle lives.
So now we have four mini-regulators for the kegs, and a fifth line that changes size from 8mm DuoTight to 3/8ths John Guest, with tap and one-way valve. This is taking the supply pressure, which the upstream reg is limiting to 30psi, and it has a very flexible line (nicked from my Blichmann Beer Gun). I use this for force-carbing, switching between gas and liquid disconnects depending on what I'm doing.
The first three kegs
Now I'm ready for beer! I moved the three kegs I had running from the keggorator, and added beer lines for them. I've kept using the same 8mm line for everything, rather than dropping to 3/16ths, which is what I did in the keggorator. This is means I need longer lines to drop the serving pressure, hence the coils you can see in the next picture. I wrapped the lines around a keg, then cable-tied them to keep them together.
I am still struggling a bit with fobbing. It seems like gas of some form is getting into the lines, which doesn't help. I'm not sure if this is air being introduced at the liquid disconnect, or CO2 coming out of solution in the lines. Yesterday I checked all the disconnects, both gas and liquid, for tightness on the top release screw and that the lines were correctly fitted, so I'm hoping the gas will end up being driven out and I will end up with just beer in the lines.
Final touches and taplist
You can see in that last photo that on the floor I have my "drip trough". This is a large garden planting trough from B&Q, which is wide enough to go under all the taps and contain any drips. This wasn't my first plan, I had bought a 40cm drip tray, but I can't figure out the best way to fit it. Clearly I can't screw it into the front of the freezer, but nor can I figure out a sensible way of hanging it from the collar - the screw holes on it are far too close to the base of the drip tray for a glass to fit under it if I did so. Either I need to drop something (pieces of wood?) down from the collar to fit it to (and which would need to be as thin as possible), or maybe sit it on something coming up from the floor.
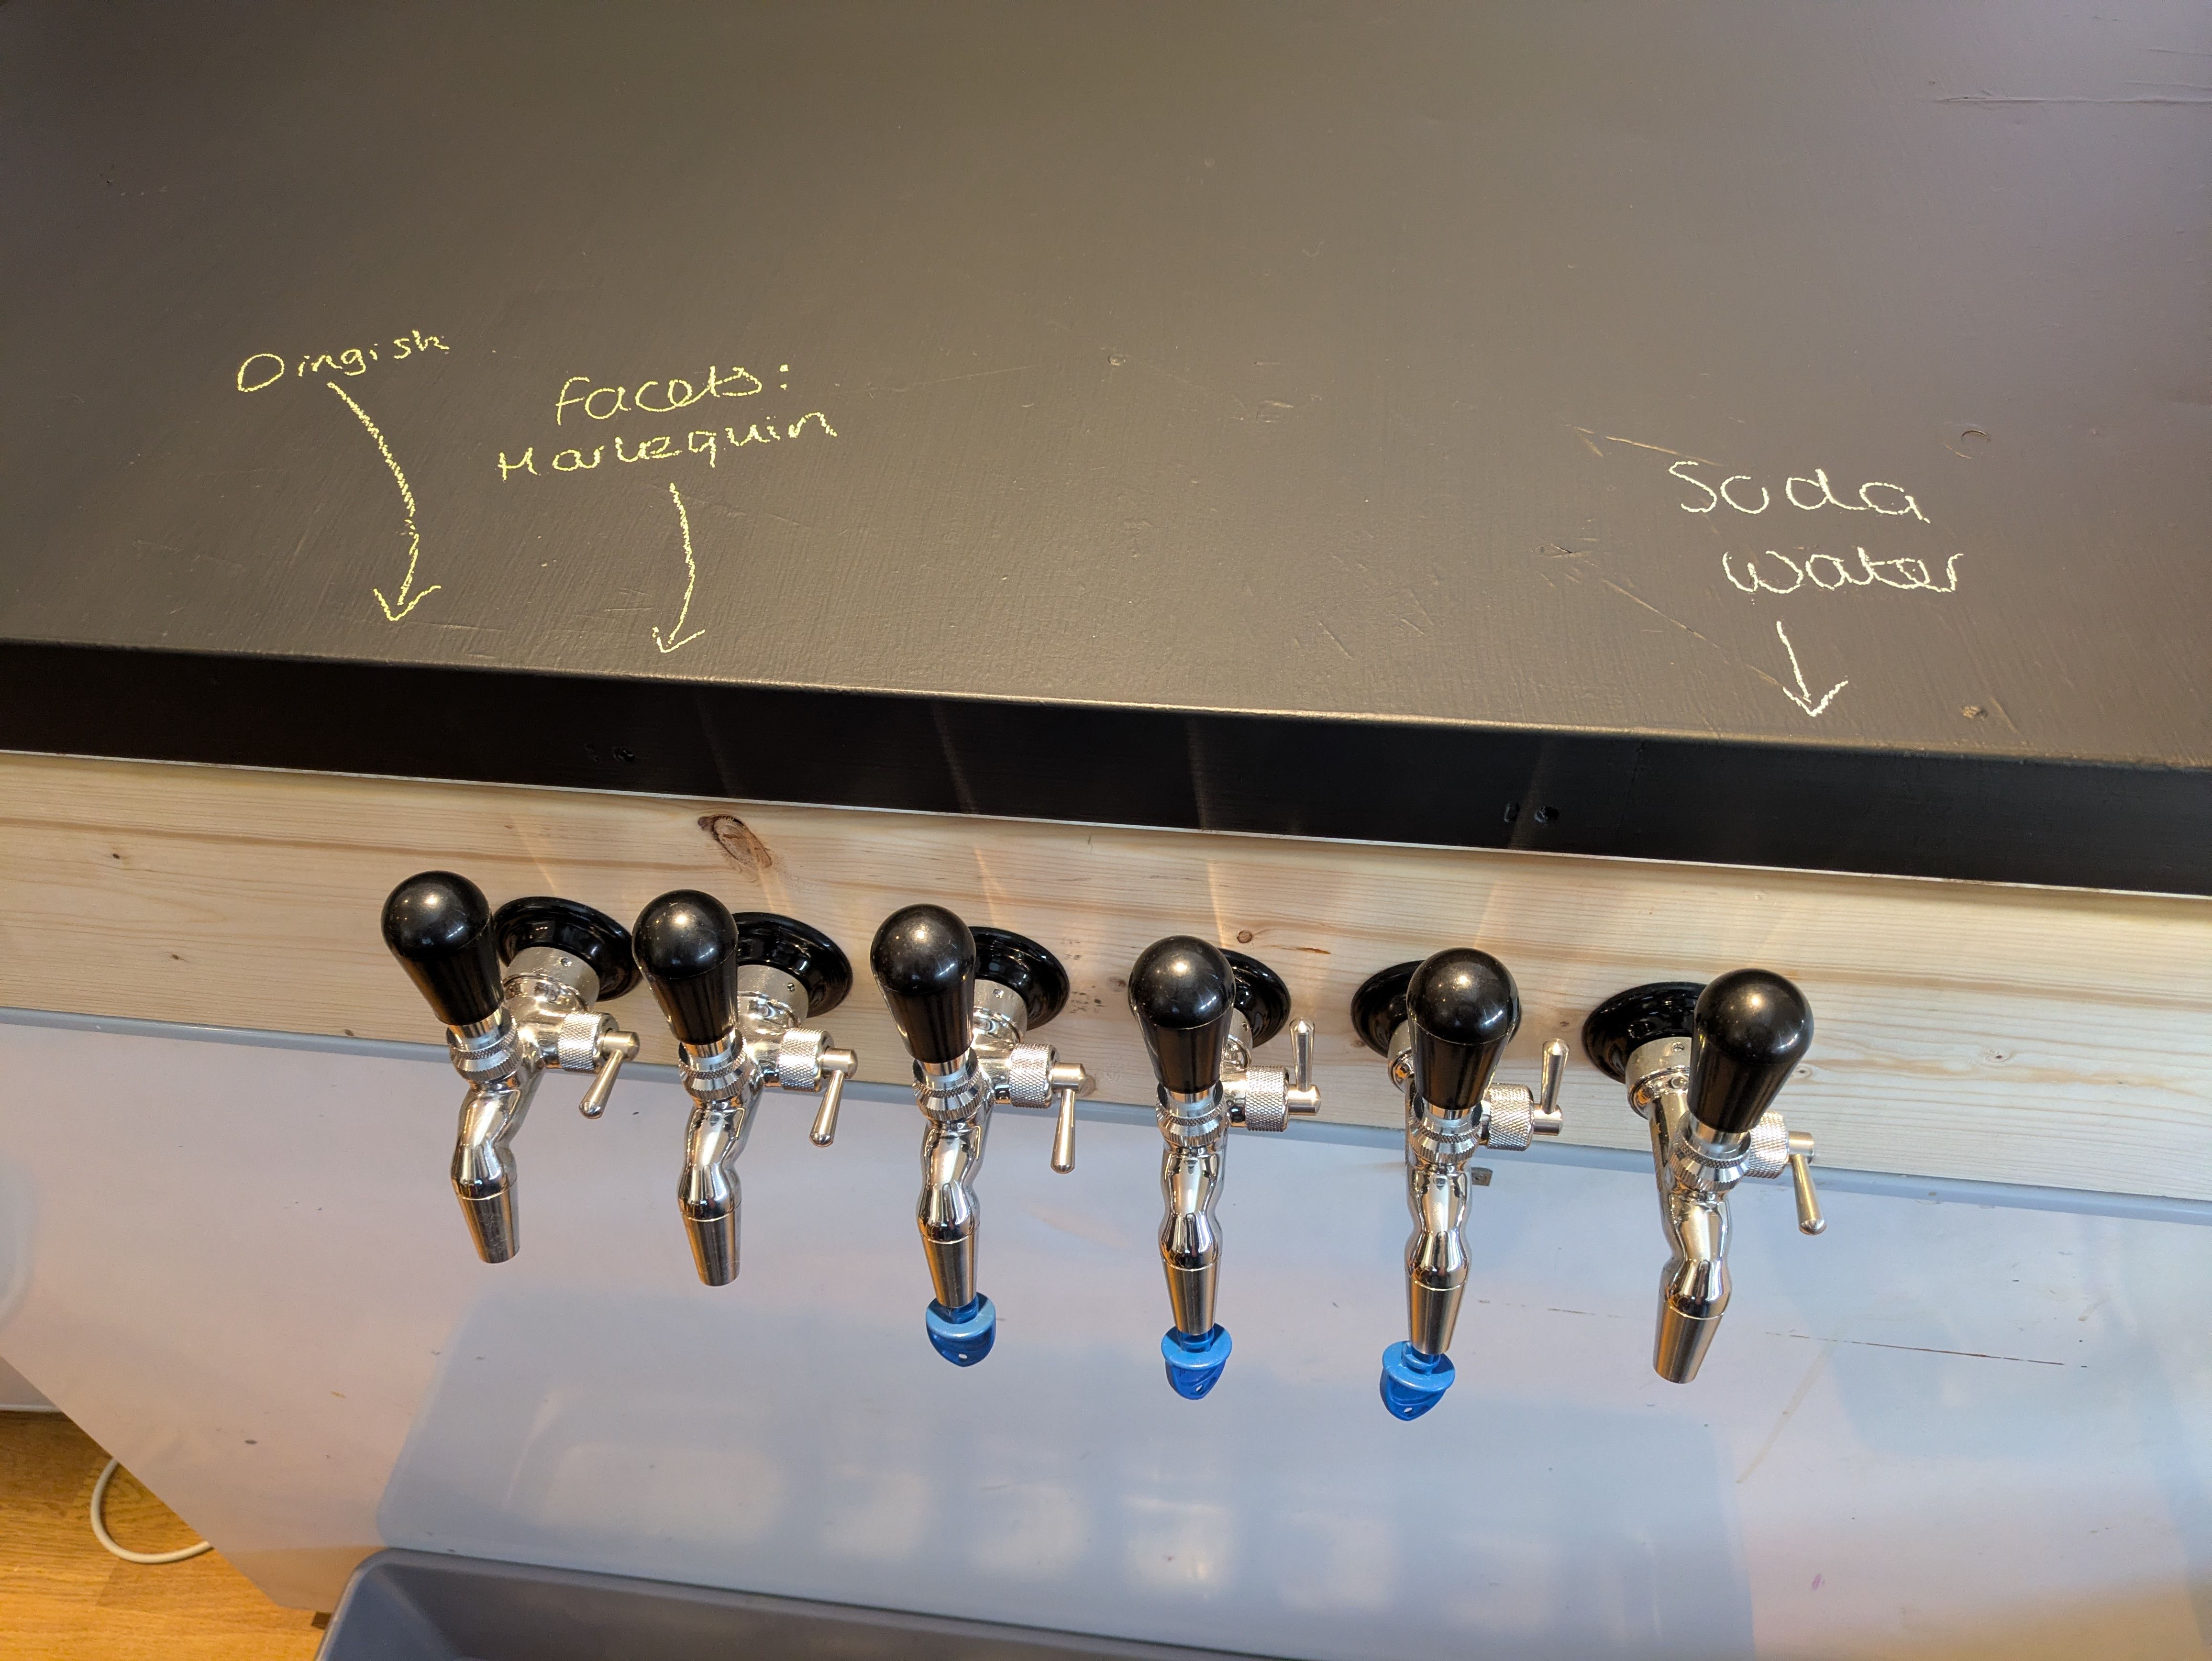
I have added a taplist to this website, which I intend to keep up to date, and (at least for parties!) I'm going to use an old tablet showing this page so you can see what's pouring. My wife had a cunning suggestion, though: blackboard paint! I have painted the lid (2 coats was all it took), so now we can just write the names of the beers on the lid. Will be interesting to see how long this lasts and when I will need to re-paint it!
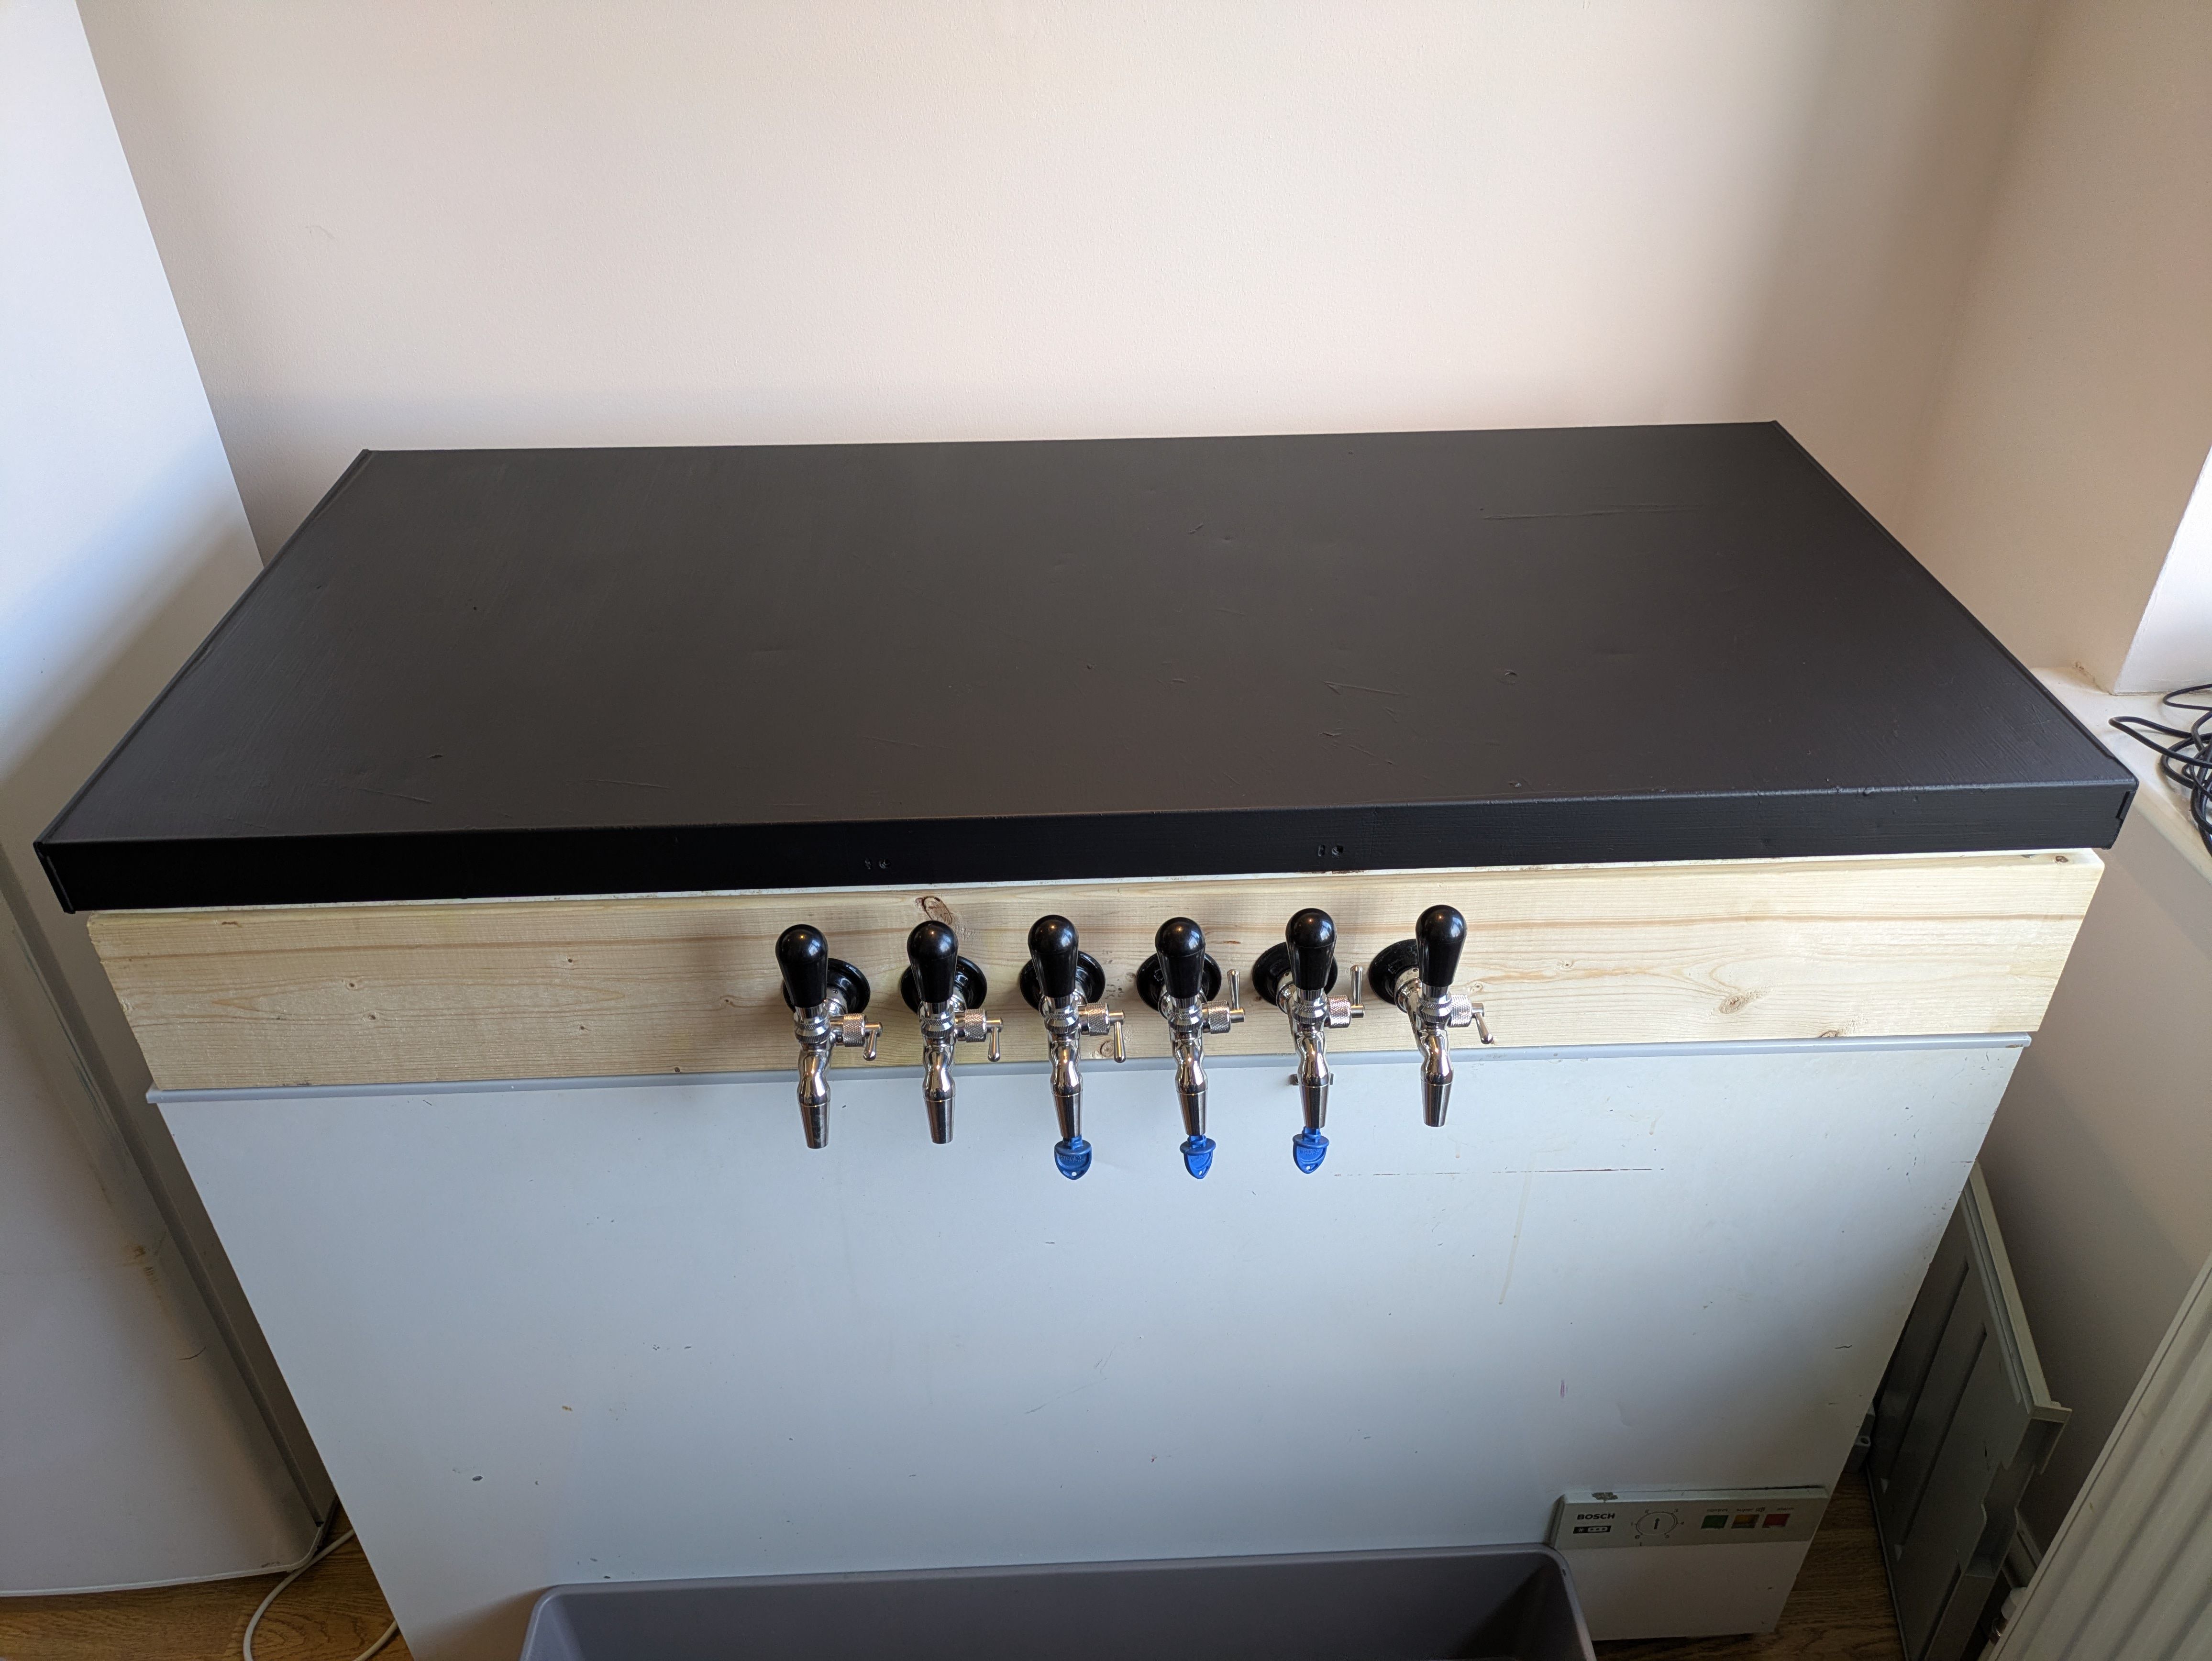
So there we go - from several-decade-old freezer, to 6-tap keezer!